User Manual
This page contains a short user manual and is organized in the following sections:
- definitions
- initial screen
- project configuration
- project list
- file import
- translation editor
- file export
- statistics dialog
- settings dialog
- translation memory panel
- glossary panel
- placeholder validation
- spelling check
- machine translation
Definitions
The main concept around which the application revolves is the translation project. Each translation project has a descriptive name and at least one language (in can be set up with just one and more languages can be added at a later stage).
A translation project must have exactly one base language, i.e. the source language that will be considered the reference value from which to derive the localized variants.
A project can contain zero or more messages, each of which is identified by a unique key corresponding to the resource ID that developers reference in the source code to display a given string in the user interface. Besides the key, each message is constituted by a segment which contains the text in one of the project languages.
In the localized versions, segments are displayed in pairs (source and target): the group of key, source message and target message can be identified as a translation unit.
Initial screen
The first screen you will be presented when opening the application for the first time is the intro screen. This screen is displayed whenever there are no projects in the current database (e.g. after deleting all the projects).

Project configuration
You can create a new project by using the “Project” > “New…” menu. This will open a dialog where it is possible to insert a name and select the project languages.
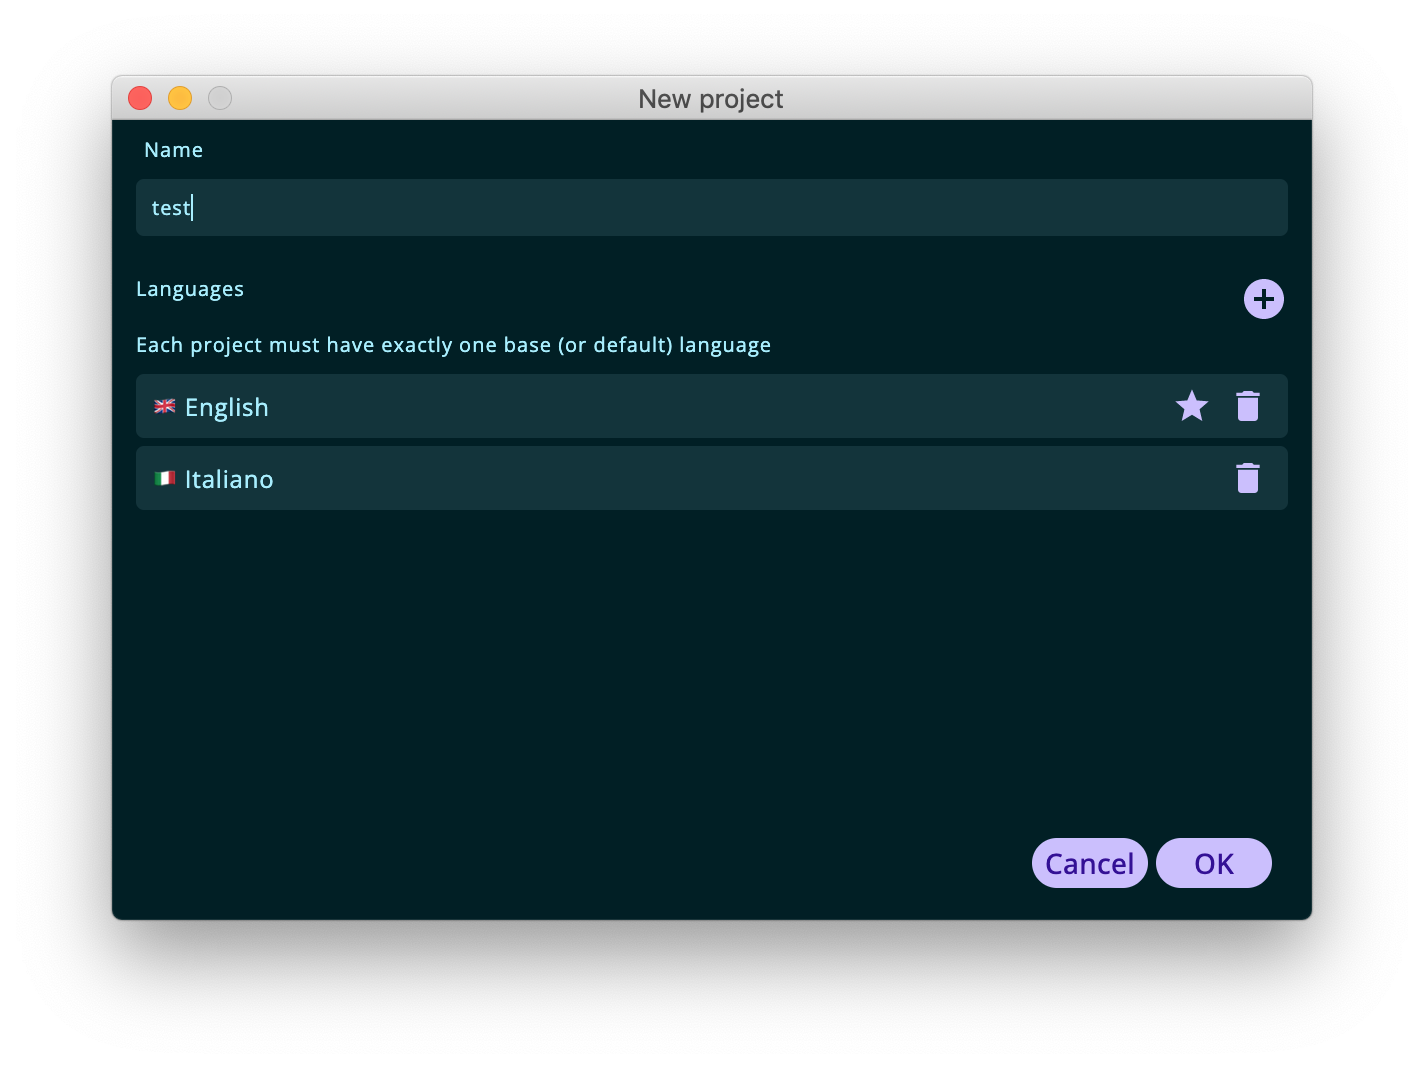
The first language that is selected will be considered the base (source) reference language and it is marked with a flag icon. When more than one language have been inserted, by clicking on an item, it will be promoted to be the base language.
The same dialog will be used when editing an existing project (“Project” > “Edit…” menu) and the fields will be prefilled with the current project configuration. New languages can be added at any time and the base language can be edited if you change your mind.
Each project can be saved to disk for persistence. MetaPhrase is designed to be as interoperable as possible with other CAT tools, so you wouldn’t be surprised to know that the native format it uses for translation projects is the TMX (Translation Memory eXchange).
After being saved to file, a project can be opened at a later stage. The application will remember the latest projects names and path and will display them in the project list screen.
Project list
When at least one project has been created and opened, the main screen displays the list of the recent projects. In this list, there are some shortcuts to the most recently used projects.
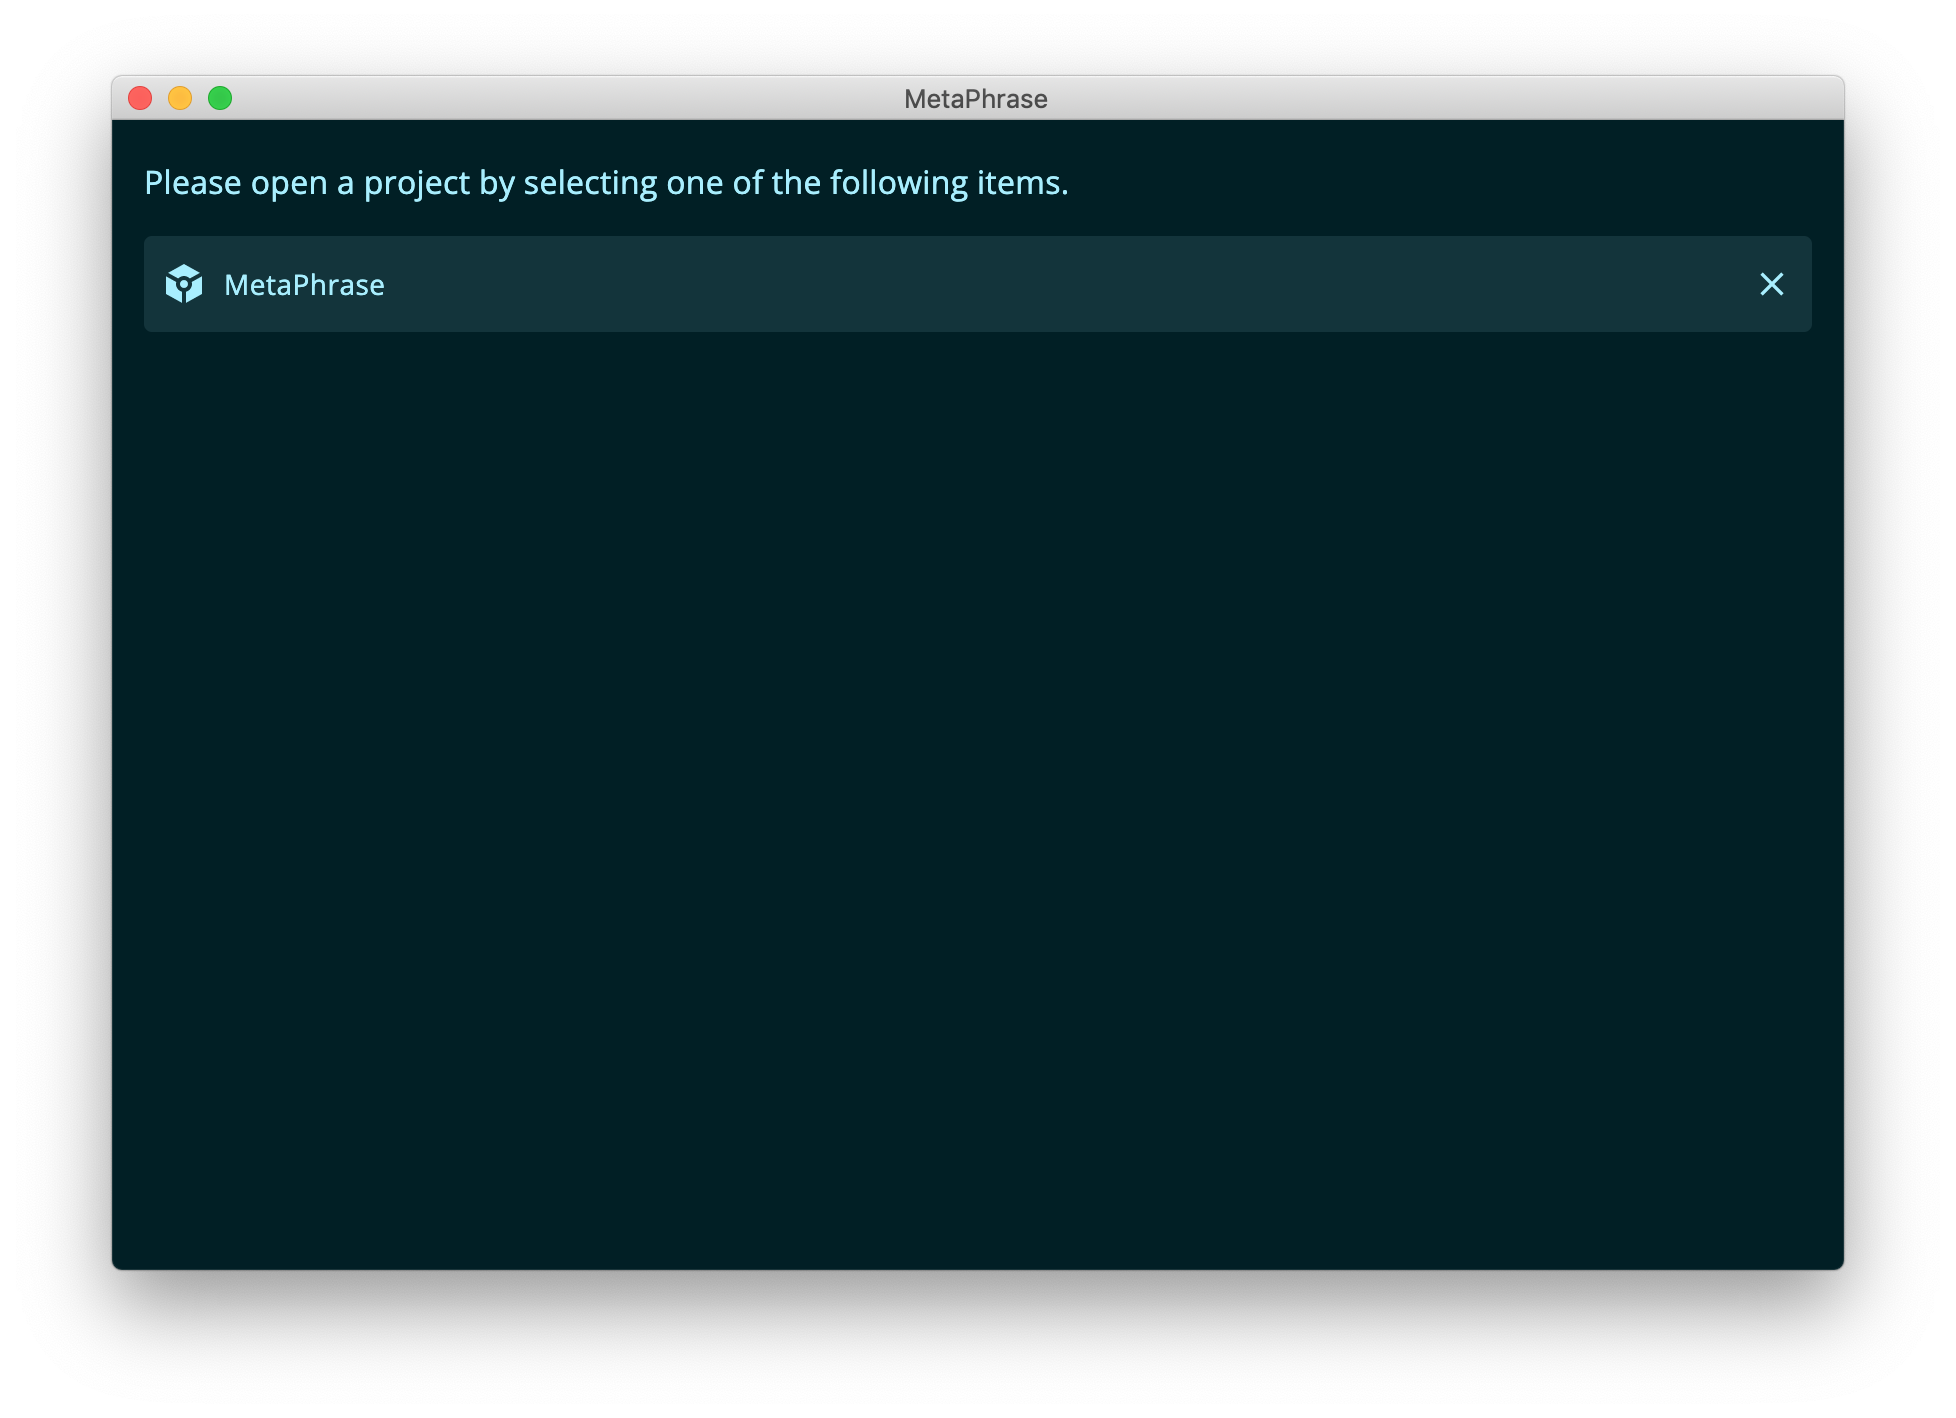
If you click on a row, the corresponding project will be opened for translation. By clicking on the cross icon, on the other hand, it is possible to remove a project from the recent list. This list is updated whenever you create a new project and save it to disk or when you open an existing project.
Import
After opening a new project, before starting the translation process, messages have to be imported, at least for the base language. Messages can be imported by using the “Project” > “Import” menu item.
Here is the list of supported file formats for import:
- Android XML resource (
strings.xml) - iOS stringtables (
Localizable.strings) - Windows resources (
Resources.resx) - GNU gettext PO files (
messages.po) - ngx-translate JSON resources (
strings.json) - Flutter ARB (
strings.arb) - Java properties (
dictionary.properties)
Since these files are monolingual, the keys and segments will be imported for the language that is currently selected in the translate toolbar. The Android XML format supports untranslatable files, so if you select an XML format as input, the imported messages will already have the translatable/untranslatable field set automatically.
It is recommended to first create the messages for the base language by importing the base resource file, then select a target language in the toolbar and import a localized resource file if you already have some existing translation.
Translation editor
After importing one or more resource files the message list will be populated in the translation editor. This same screen will also be displayed whenever opening an existing project which already contain some messages.
The translation editor is made up by two parts: the translate toolbar and the message list. The bottom part of the translation screen contains the status bar which displays the name of the project (prefixed with an asterisks if there are unsaved changes) and the translation unit count.
Translation toolbar

In the first place, the translation toolbar contains some shortcuts for the main functions of the editor:
- Move to previous segment: moves the focus to the previous segment, if any
- Move to next segment: moves the focus to the next segment, if any
- Copy source: copies the source text in the target message field
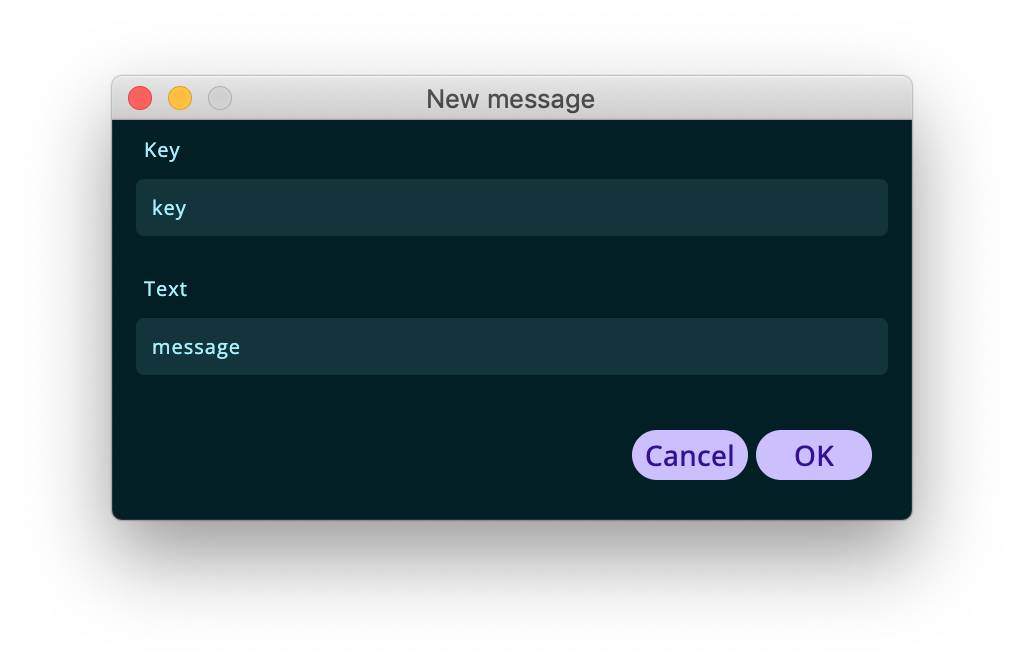
- Create segment: opens a dialog to insert a new message by specifying the key and source text
- Delete segment: deletes the current segment
- Validate placeholders: starts a placeholder validation, the results of which will be displayed in the Validation panel.
Secondly, the toolbar contains the language selector, which allows you to change the current language being edited. The language has an impact on what will be imported / exported, the fuzzy matches displayed in the Matches panel and the glossary terms.
In the third place, the toolbar allows to filter messages by state:
- All: displays all the messages regardless of their translation status
- Untranslated: displays only the translatable messages that do not contain any target message and need to be translated
- Translatable: filters out all the untranslatable messages (this is the default for local languages).
Finally, the toolbar contains a search field that allows to filter any message containing a substring in the key, source variant or target variant.
Message list
The message list displays a set of messages that can be modified or translated. It has two modes depending on whether the current language (in the toolbar language selector) is the base language or a target language. If the current language is the base language the editor will work in source mode otherwise, if a local language is selected, the editor will work in target mode.
The key of each message is always displayed in both modes to provide some context: if the developers used some sensible conventions, the key may give some hints about the string role in the UI, e.g. whether it is a dialog title or a field placeholder, etc.
Source mode
When the source language is selected, the editor allows to modify the source variant of each translation unit. Additionally, some messages can be marked as untranslatable using the lock icon on the right side of each item, implying that they will not be displayed for translation in the editor target mode.
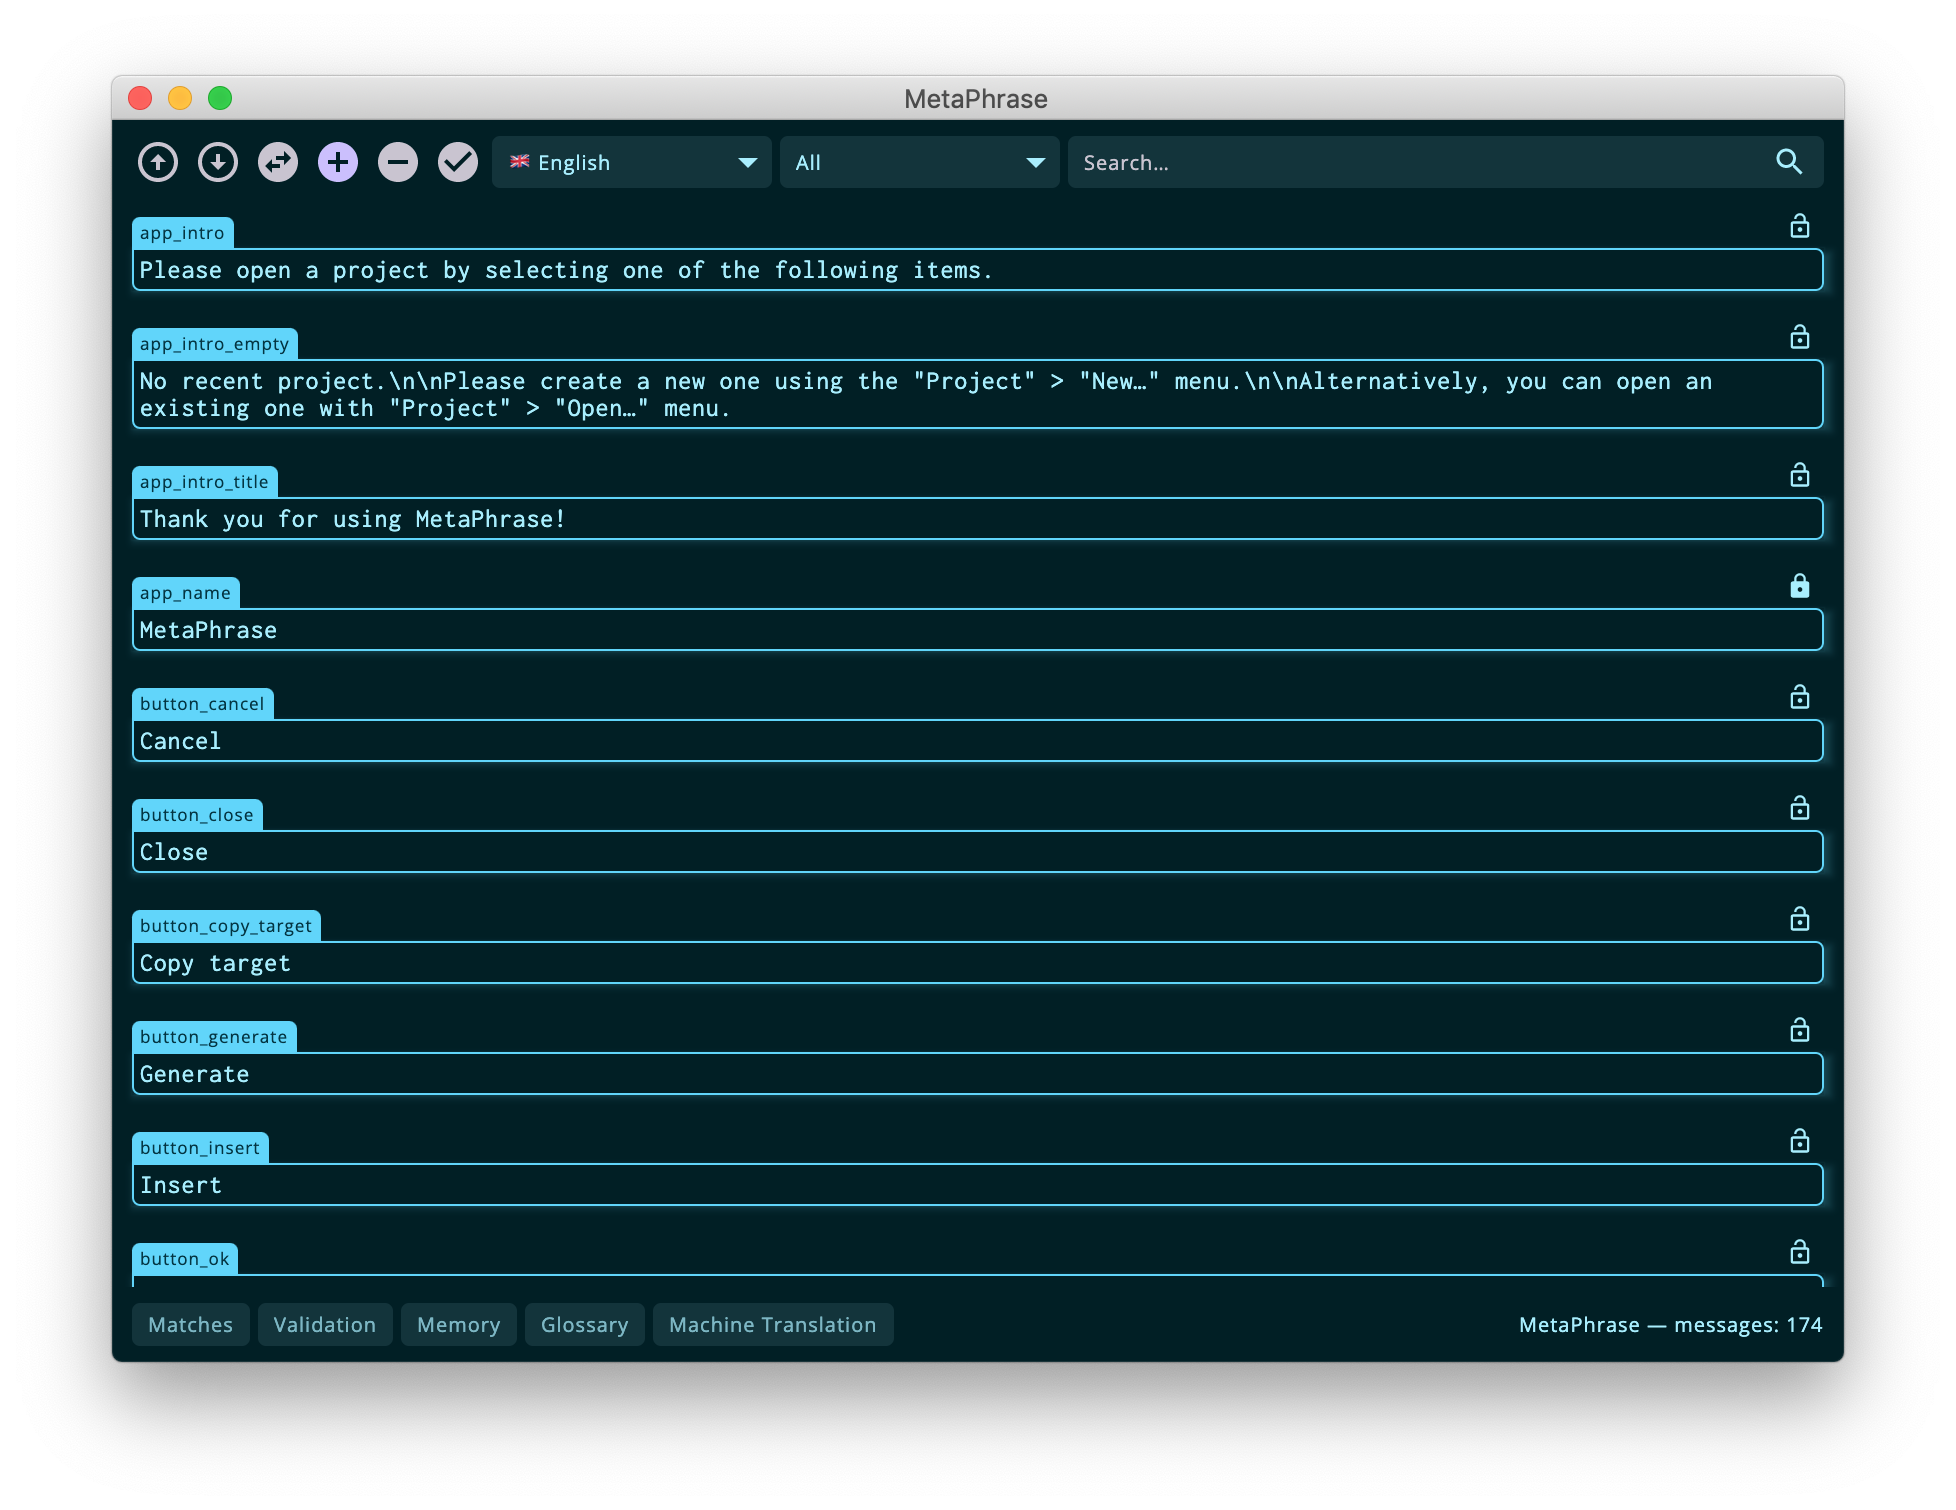
Whenever a message is being edited its spelling is checked and errors are displayed in red. By right-clicking on an error it is possible to insert a suggestion.
Target mode
When a non-base language is selected in the toolbar, messages are edited in their localized version and the base message is displayed as the source text and can not be changed.
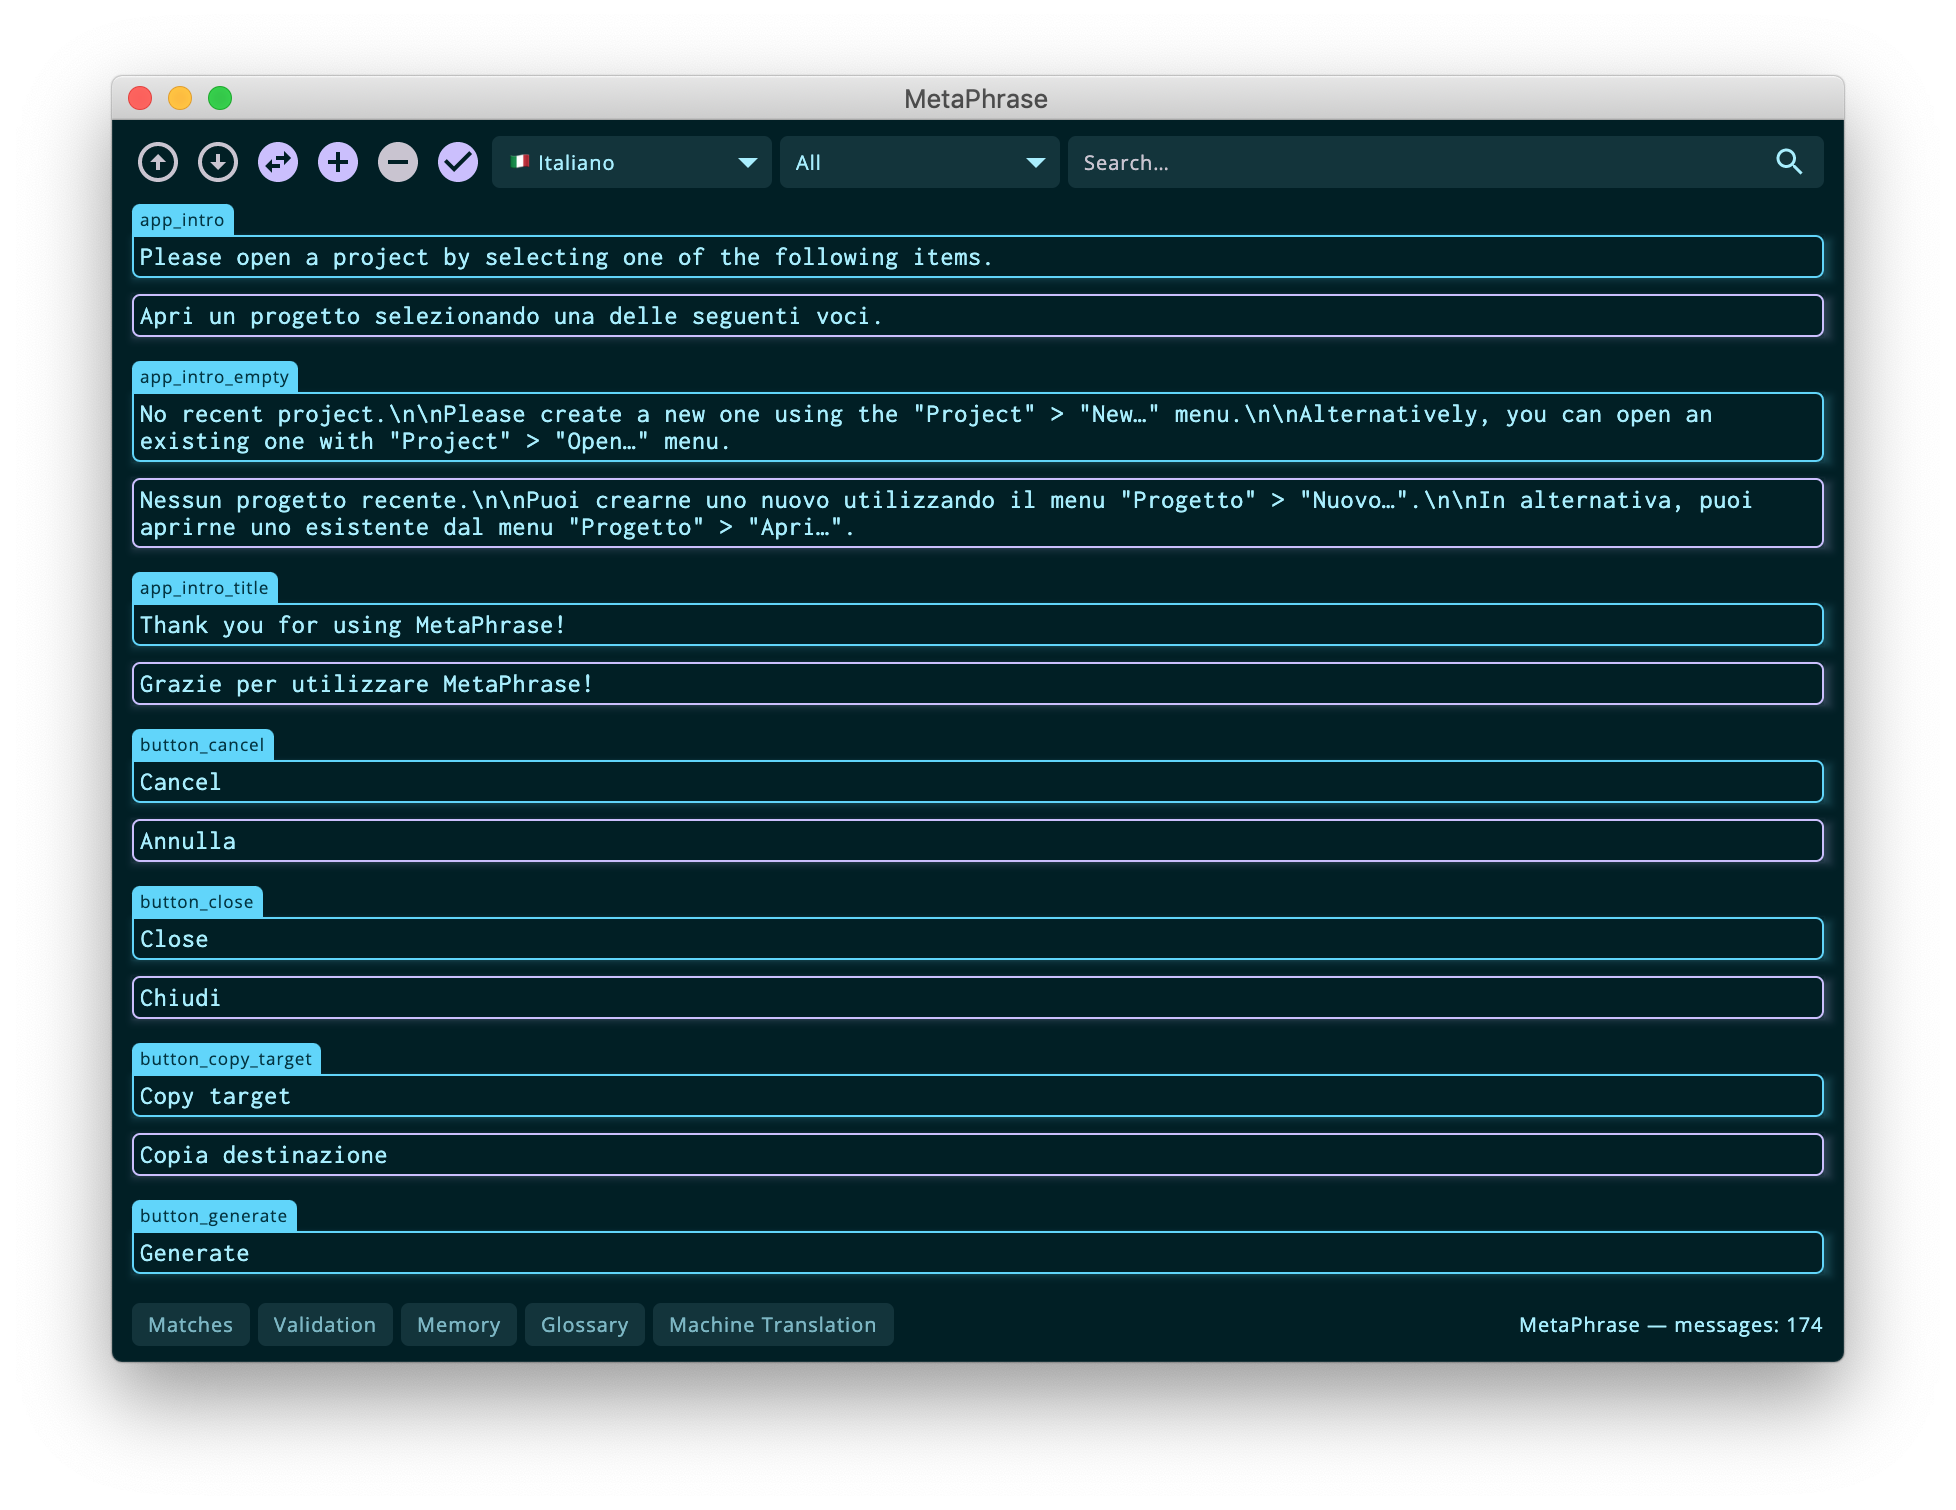
Whenever a message is being edited, apart from spelling mistakes, the source language is matched against the content of the translation memory (TM) and the matches above the similarity threshold are displayed in the Matches panel (more on this here). Any term present in the glossary is displayed in the Glossary panel (more on this here).
New segment creation
It is possible to add new messages specifying a key and the source message. This is more useful to project managers or developers than to individual translators, but is offers a handy shortcut to insert new messages without having to re-import resource files.
Export
Once the translation if finished, MetaPhrase makes it easy to export all the messages back to a native resource file to be integrated in the localized application. It is possible to export the list of messages in the following formats:
- Android XML
- iOS stringtable
- Windows resx
- GNU gettext PO
- ngx-translate (Angular) JSON
- Flutter ARB
- Java properties
For Android, untranslatable messages are included only in the base resource file and are not replicated in localized versions. On the other hand, for the other formats, all messages are included in all versions; in the localized ones the value of the string will be the same as the base variant. This is intended, because there is no such thing as a “non-translatable” message on iOS or other resource formats.
Statistics
The statistics dialog can be accessed via the “Project” > “Statistics…” menu item. It displays a set of overall statistics for the project (all languages) as well as some language-dependant information.
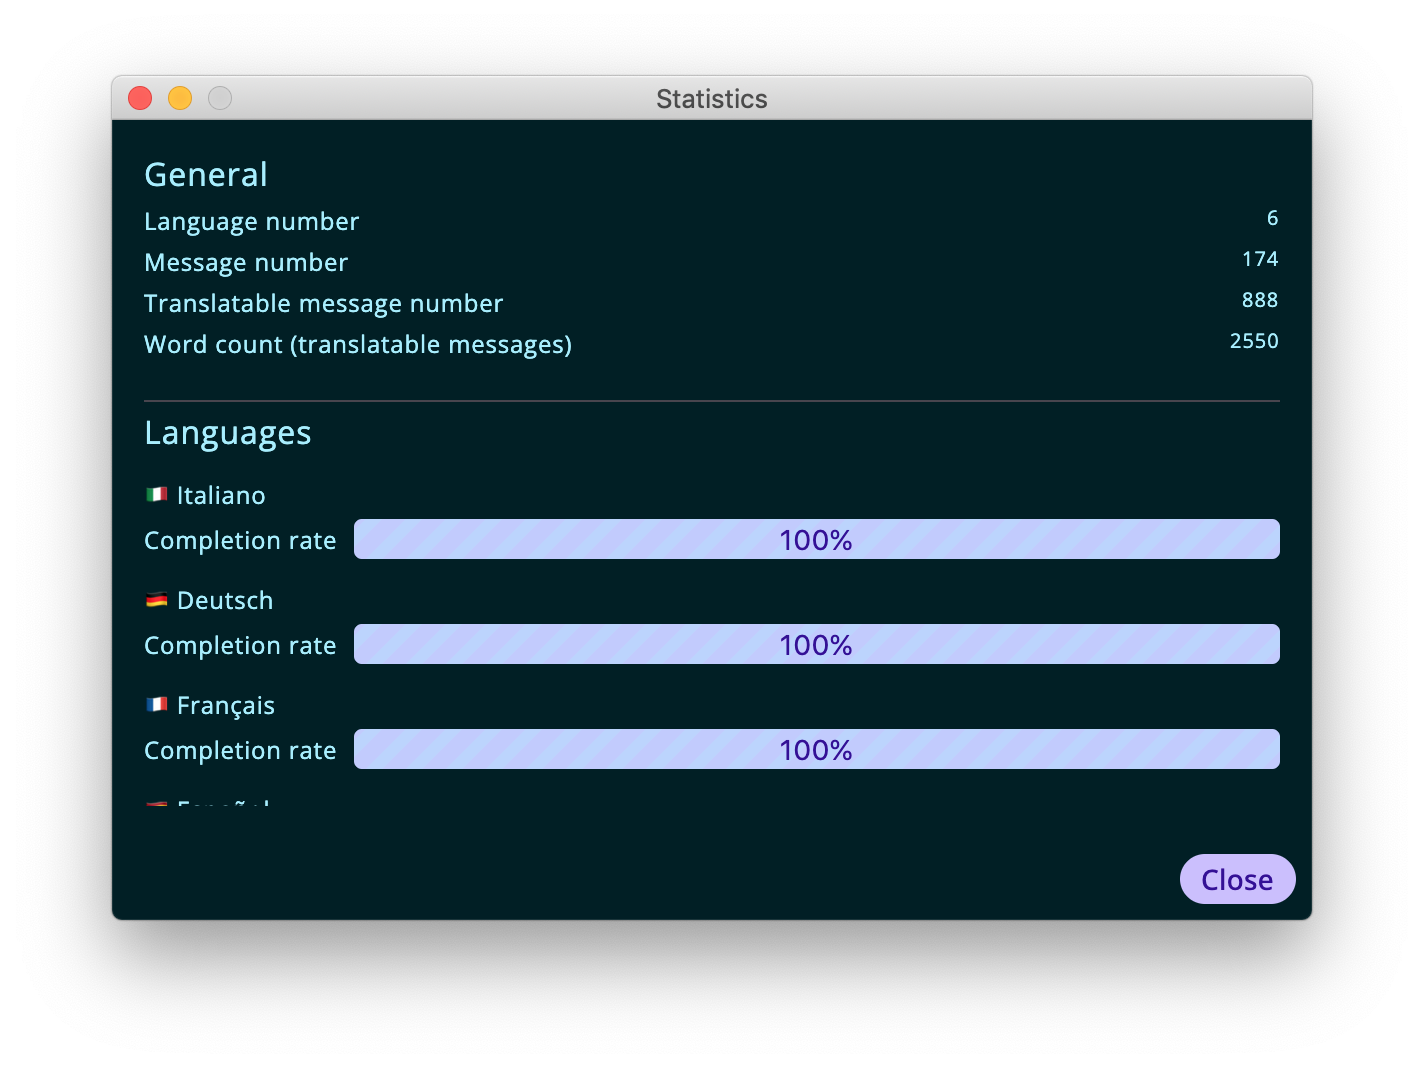
The general statistics being displayed are the following:
- number of languages
- total number of messages
- number of translatable messages (defined as total number of messages - number of messages marked as untranslatable)
Then, for each language in the project, a completion rate is calculated corresponding to the percentage of messages for that language that have a non-empty translation over the number of translatable messages.
Settings
The settings dialog allows to configure the application appearance and behaviour. The dialog is divided into tree tabs that refer to different functions of the application.
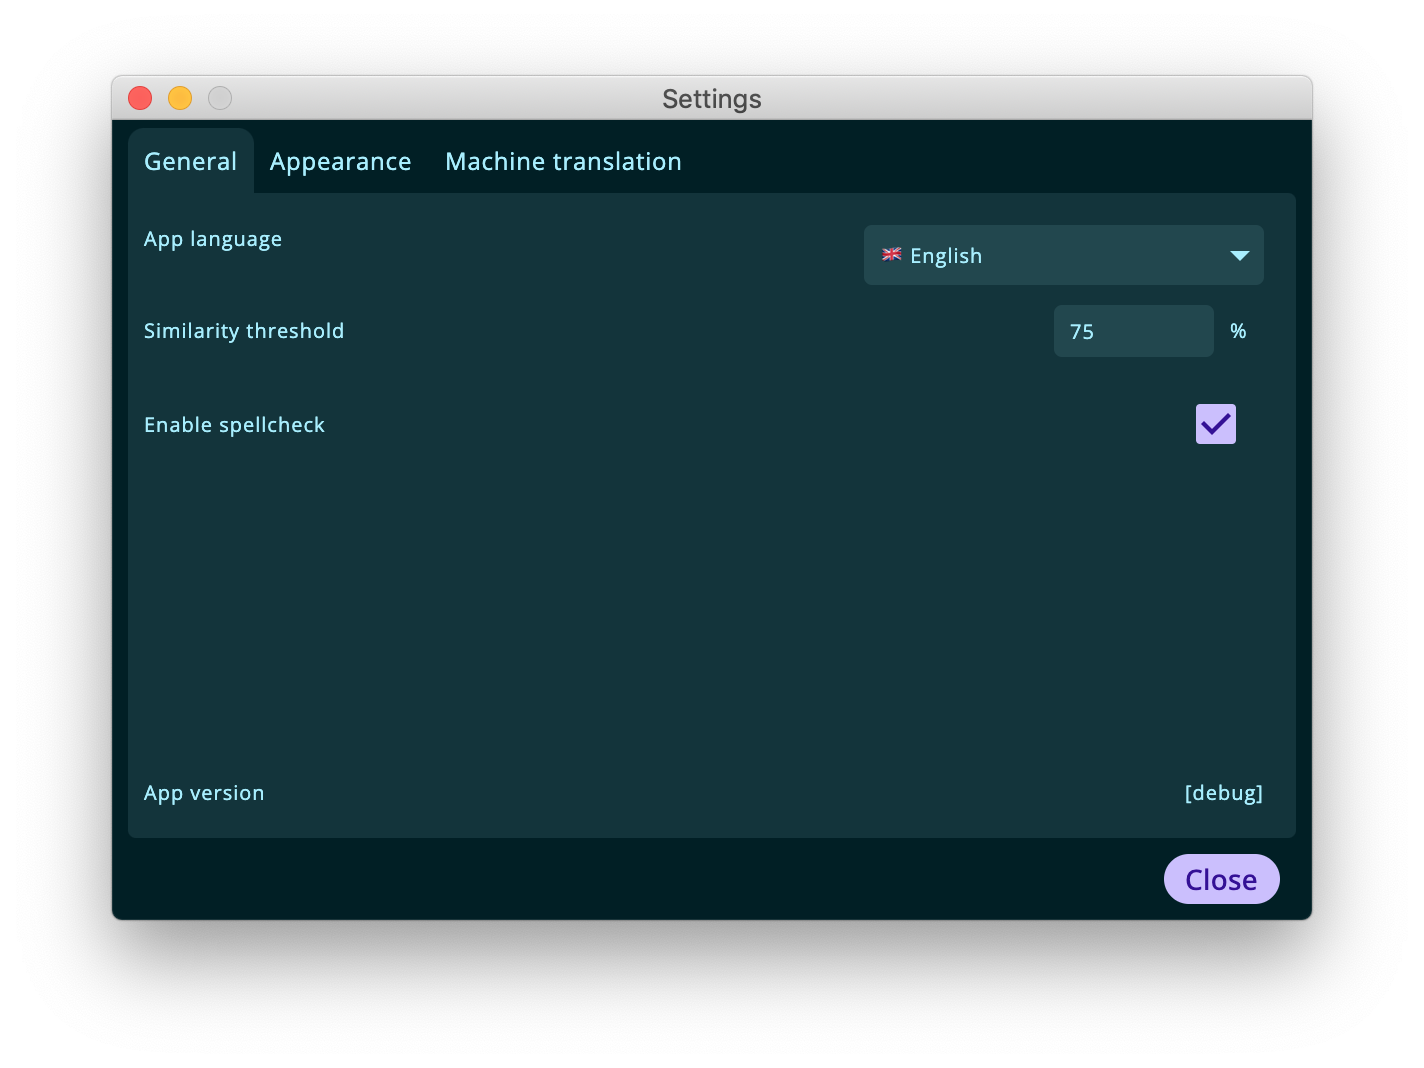
The “General” settings tab allows users to:
- change the application UI language (defaults to system language)
- configure the minimum similarity threshold for segments to be displayed in the Matches panel as fuzzy matches, items with a score lower than this threshold will be filtered out (defaults to 75%)
- see the application version for bug reporting purposes.
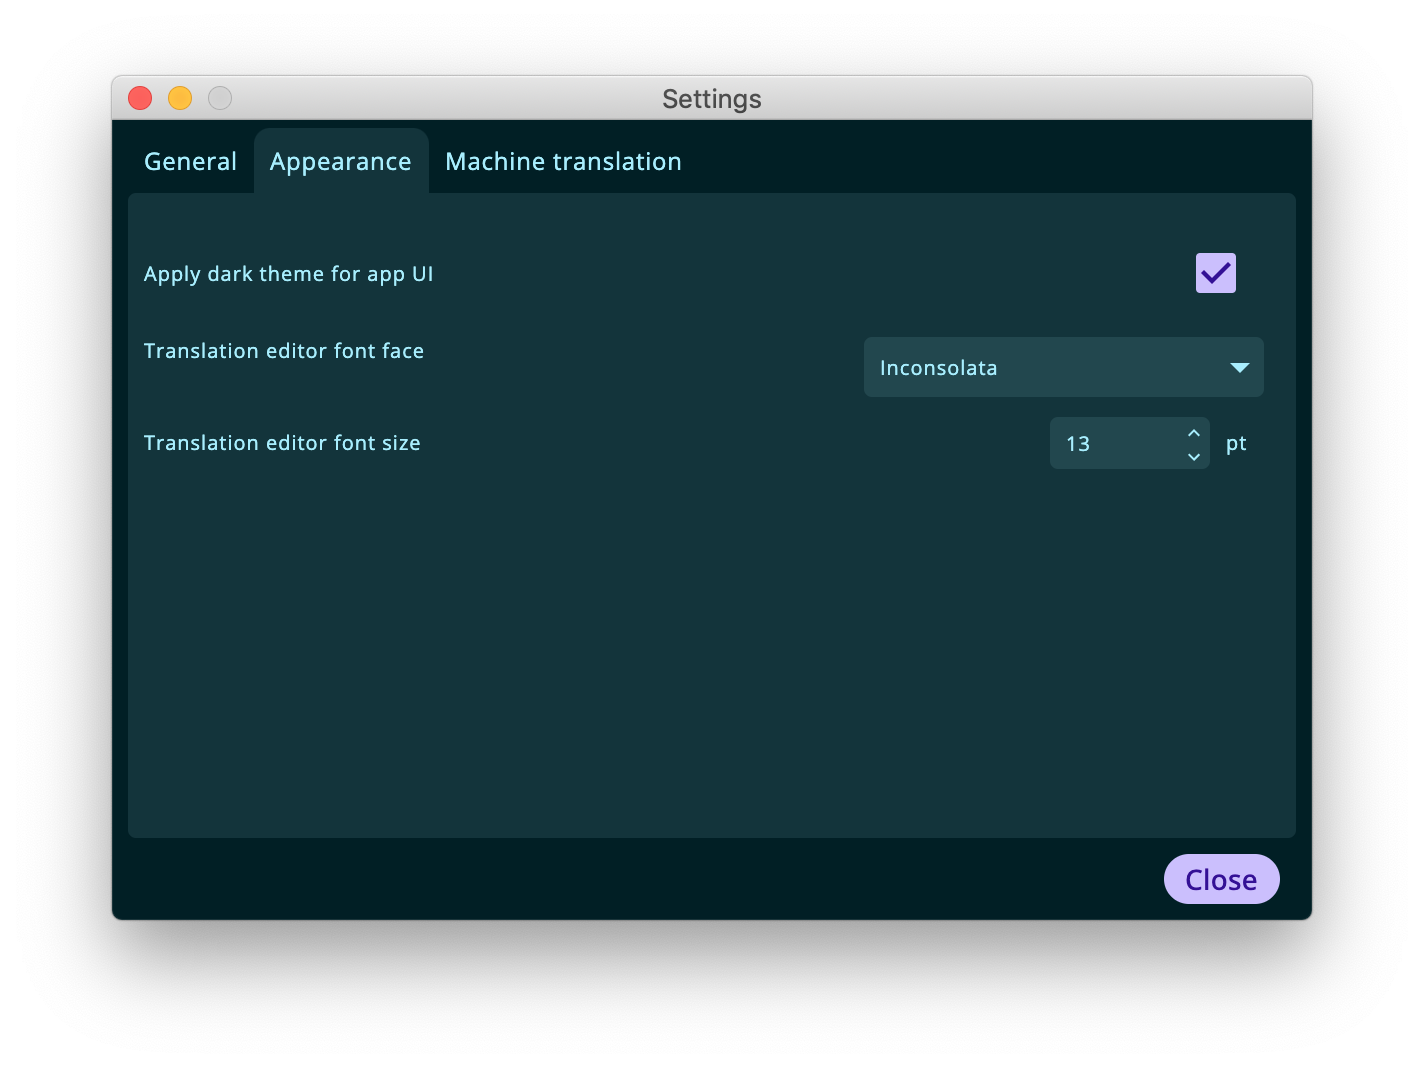
The application look and feel can be customized in the “Appearance” tab, which allows users to:
- switch between dark and light UI themes
- change the editor font face
- change the editor font size
Finally, the “Machine translation” tab allows users to configure the settings for machine translation:
- select a provider for the retrieval of messages
- specifiy an API key for the above mentioned provider
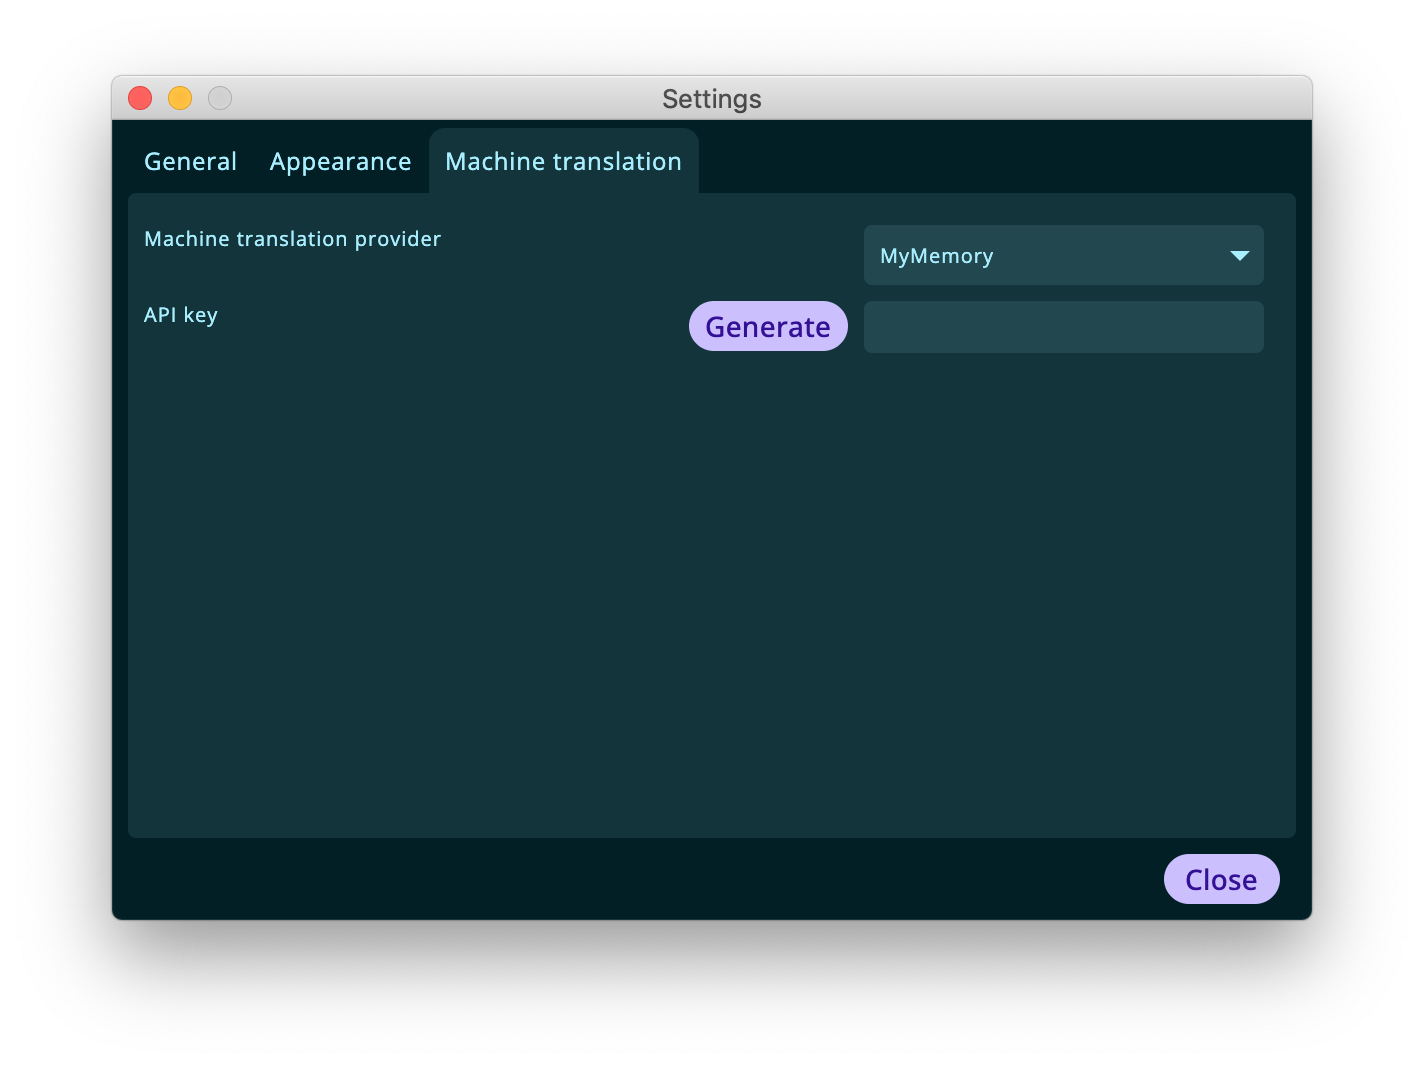
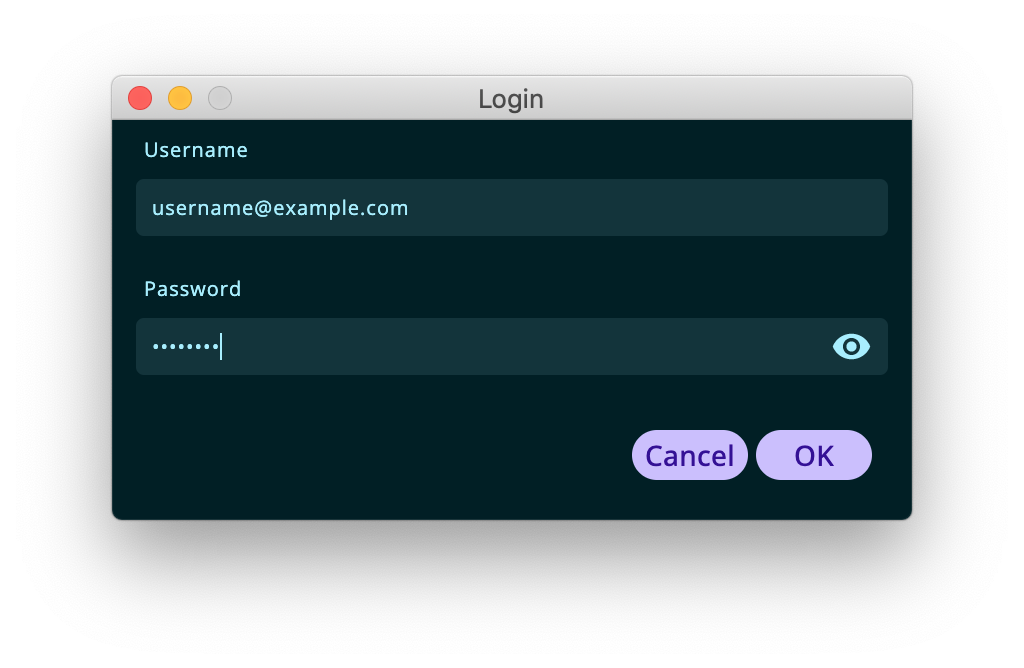
If you are using the MyMemory machine translation provider, the application offers a shortcut to generate an API key for your user. Please use the generate button and insert your credentials (which will not be saved anywhere), afterwards the key will be visible in the corresponding field.
Translation Memory
MetaPhrase contains a translation memory (TM) feature to reuse existing translations across projects or within the same project. Users can interact with the TM two ways: either examining fuzzy matches during the translation in the “Matches” panel or browsing the its content in the “TM content” panel.
Matches panel
This panel displays all the entries in the translation memory that are similar to the currently edited message with a rage higher than the threshold configured in the settings dialog.
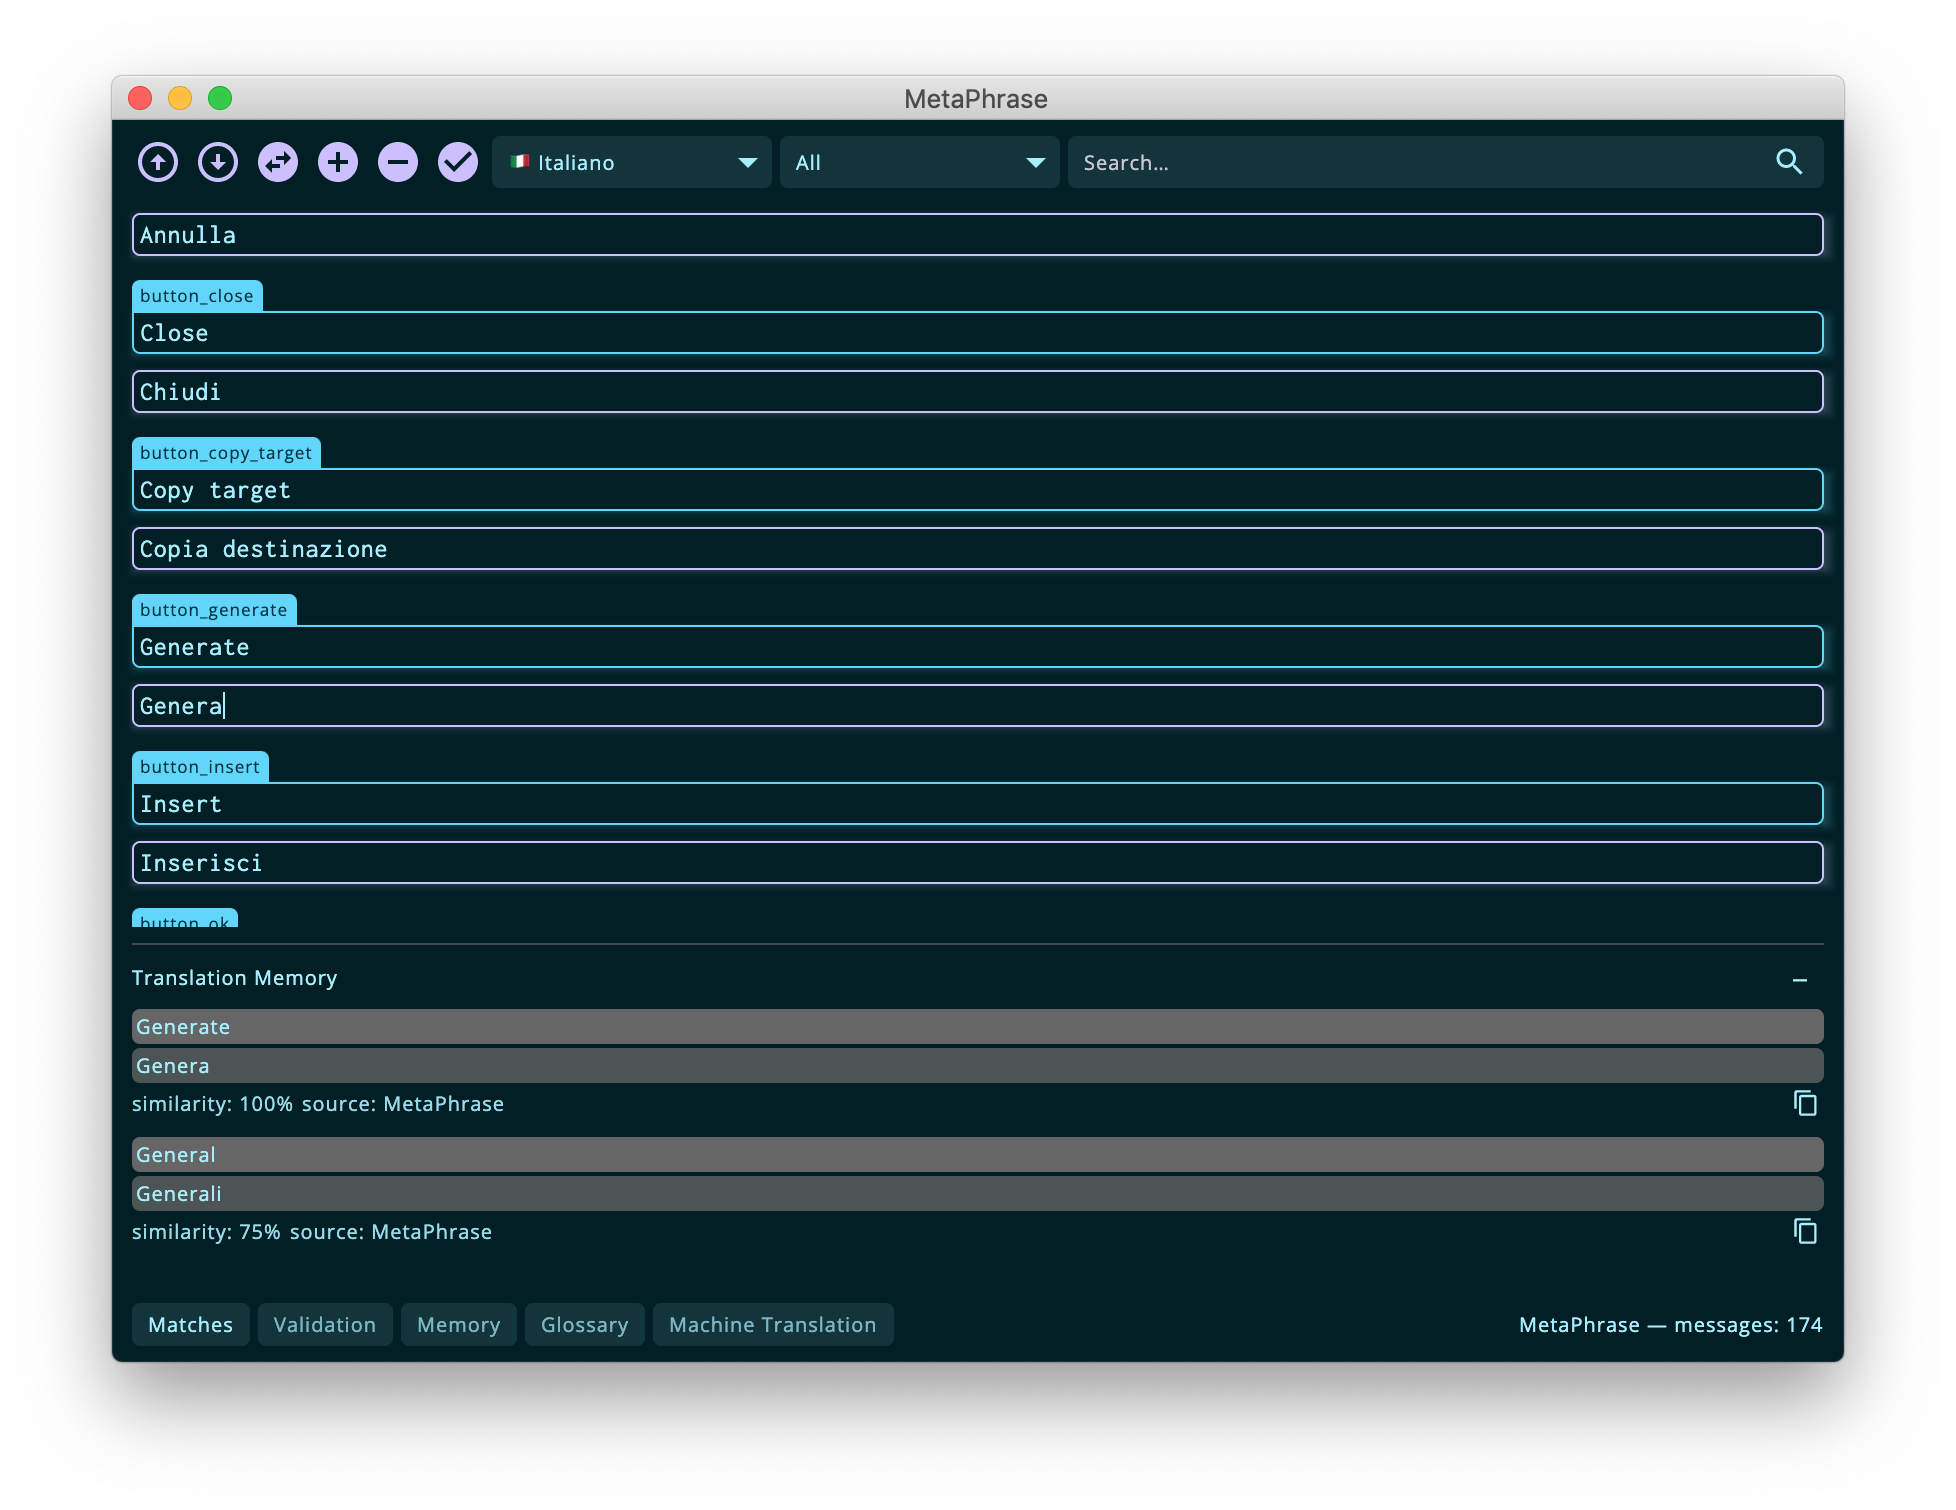
The best match can be inserted via the “Memory” > “Insert best match” menu, every other match can be copied to the target field via the copy button.
How is the TM populated? During the translation process, all the messages are saved internally and if a message has a source segment with a similarity rate higher than or equal to the threshold value configured in the settings dialog, they are displayed as internal matches with the label “origin: this project”.
Additionally, the application has a global TM shared across all projects which works in a similar fashion. All the entries of a project can be added to the global TM using the “Memory” > “Sync project with TM” menu item, e.g. when the translation is finished and all the strings are validated.
TM content panel
The TM content panel allows users to browse the TM content as if it were a bilingual corpus and look for concordances.
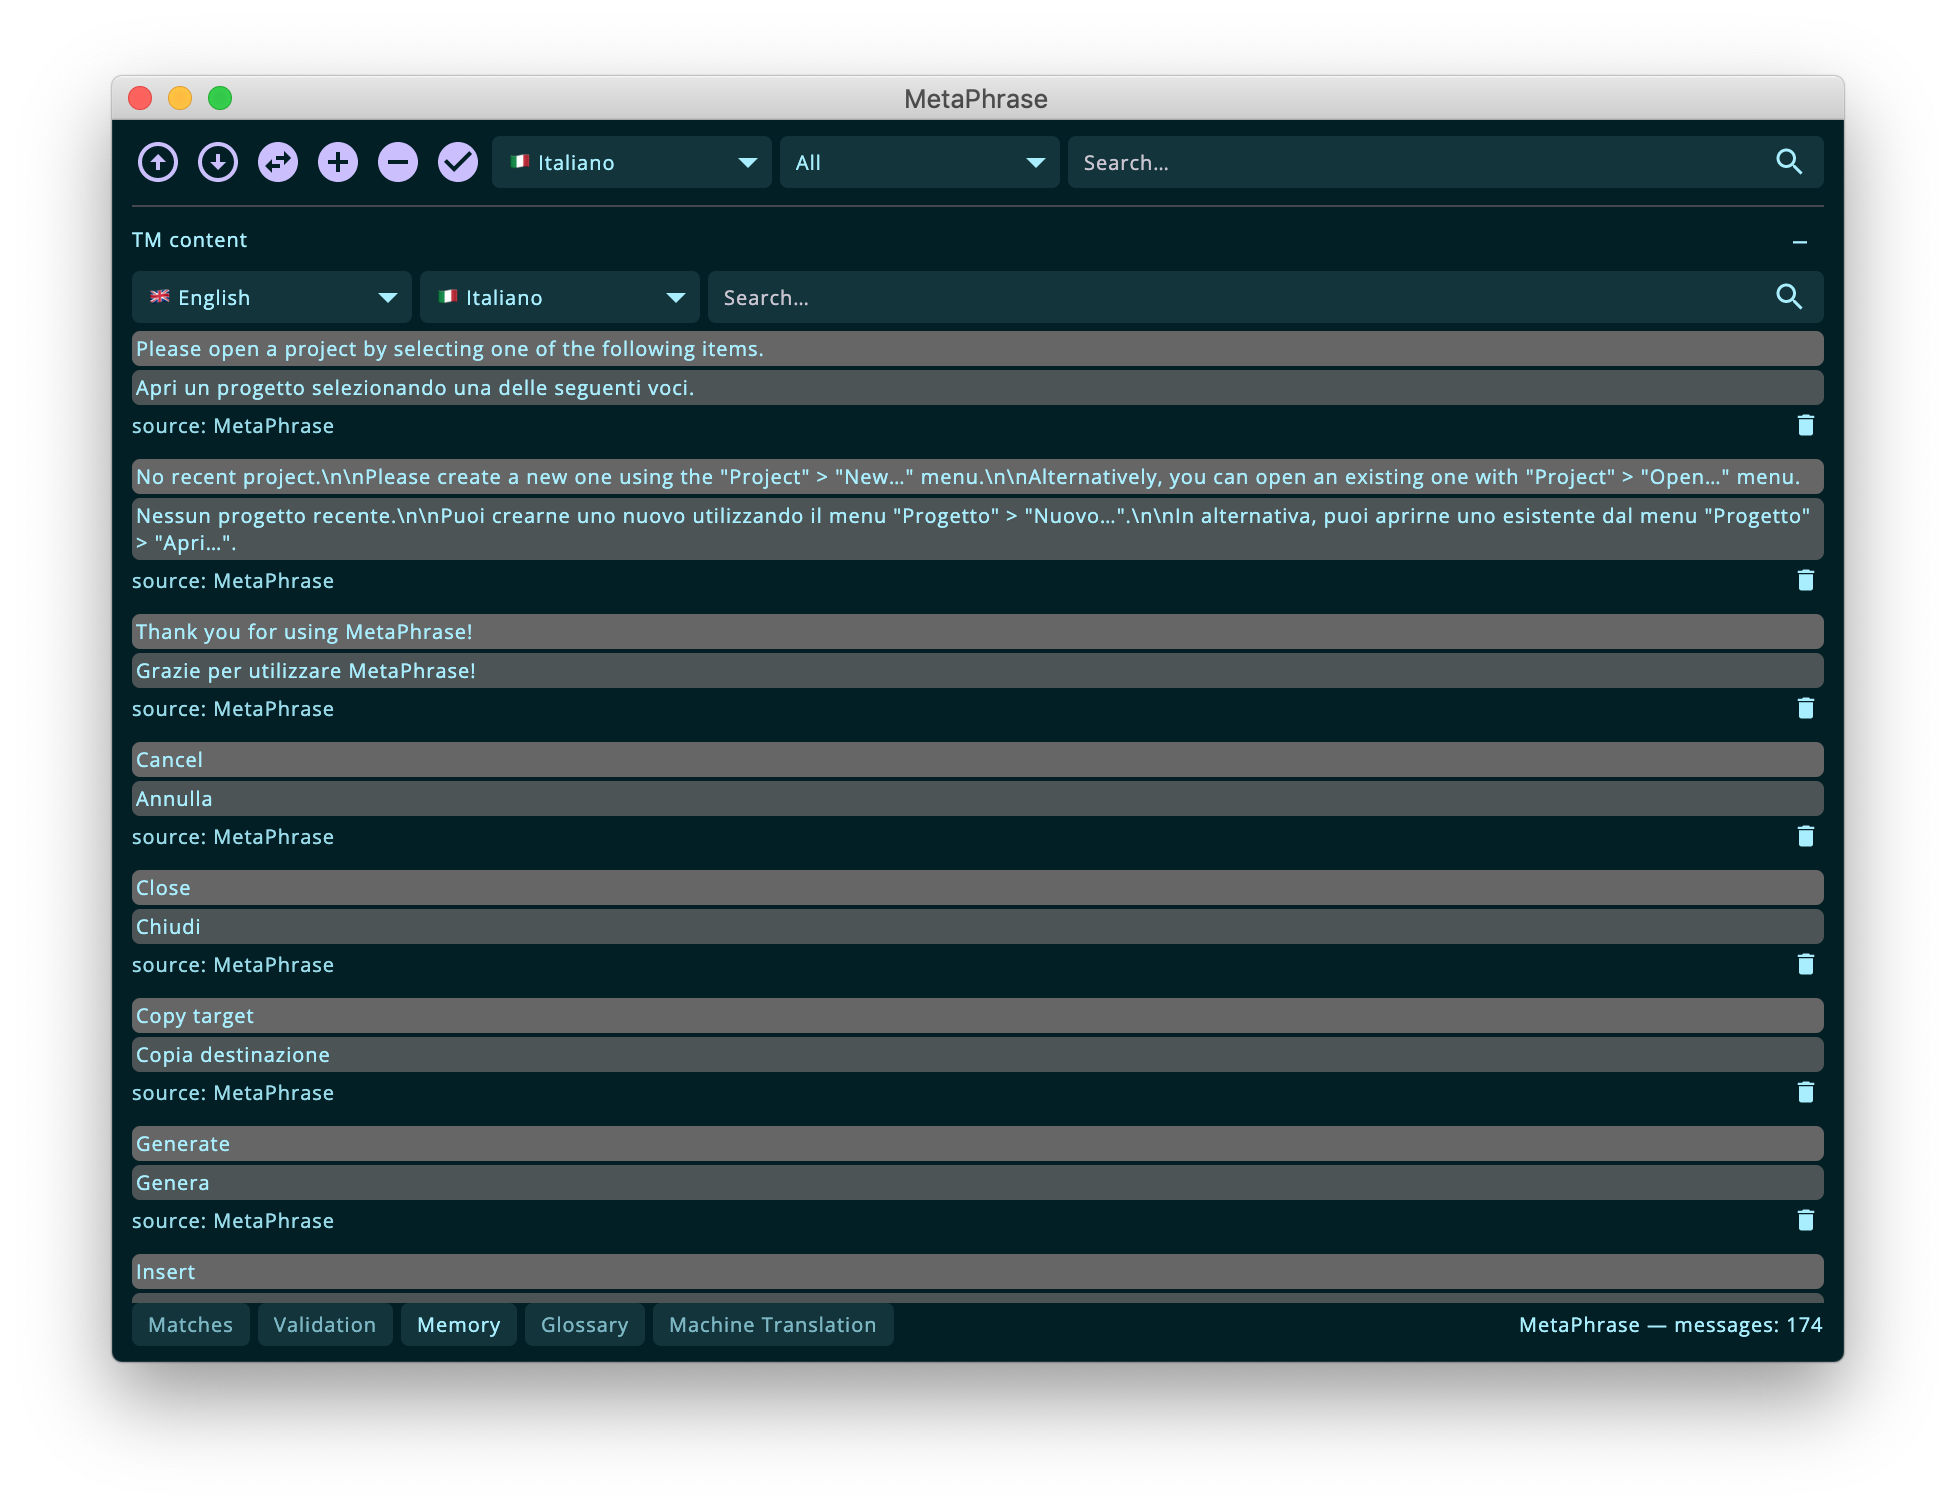
In this mode, no similarity is taken into account for displaying the memory entries. Instead, by selecting a linguistic combination (source/target languages) and optionally a textual query it is possible to browse the content of the TM.
This comes in handy for when you want to remember how you translated a given piece of content which is not (yet) in the glossary or if you want to consult some message no matter the similarity with the currently opened message in the editor.
TM import / export
MetaPhrase can also export all the messages of a project as a multilingual translation memory in the TMX (Translation Memory eXchange) format with the “Memory” > “Export” menu item. Moreover, individual TMX files can be imported in the global translation memory by means of the “Memory” > “Import” menu item. In this case, the origin displayed in the memory panel corresponds to the name of the TMX file imported without the .tmx extension.
Glossary
The glossary panel is updated every time a message is opened for translation. The source variant is scanned word-by-word and each word is first stemmed according to the rules of the source language, then it is looked for in the internal glossary for matches against the target language. If you are working with the editor in “source mode”, then only source terms are displayed and there are no target counterparts.
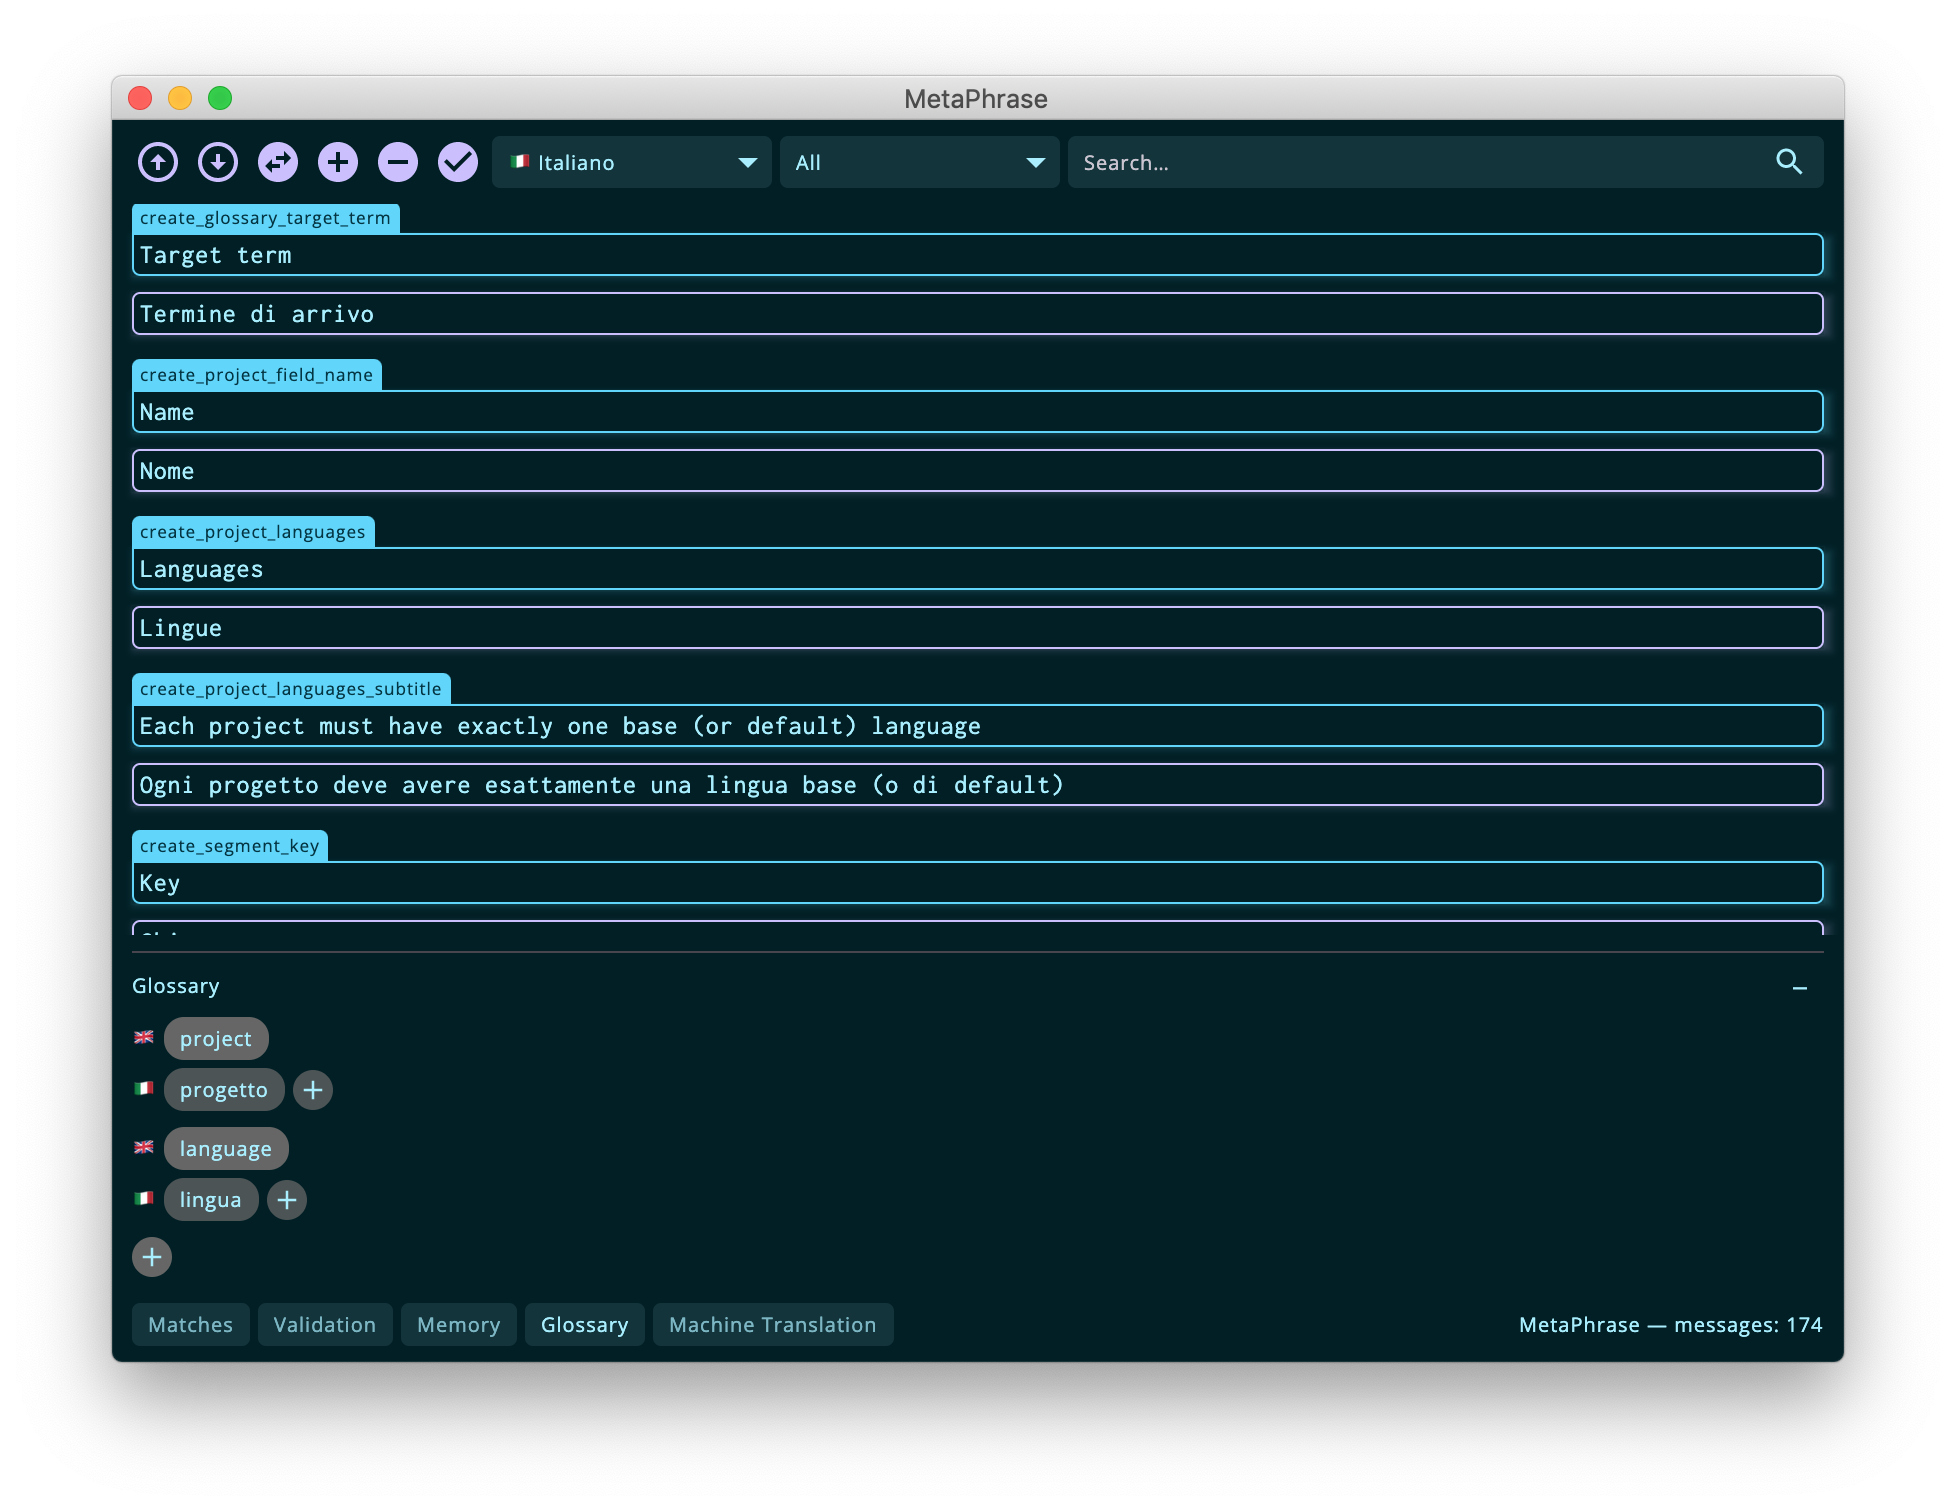
It is possible to have m:n associations between terms so multiple target entries can exist for a single source term. By using the “+” button it possible to add both source terms and target terms, whereas by right-clicking on a term it is possible to delete it permanently.
You can quickly add new terms to the glossary without having to type them in: simply select a term in the translation editor, right-click on in and select the “Add to glossary” item from the context menu. If you are working in the source language (source mode) the term is added immediately to the glossary, if you are working in a target language, you will be given the opportunity to add the source term in a dialog.
Finally, MetaPhrase offers the possibility to import and export glossaries in CSV. It is important that each file should start with a “header” containing the language 2 character locale codes.
Validation
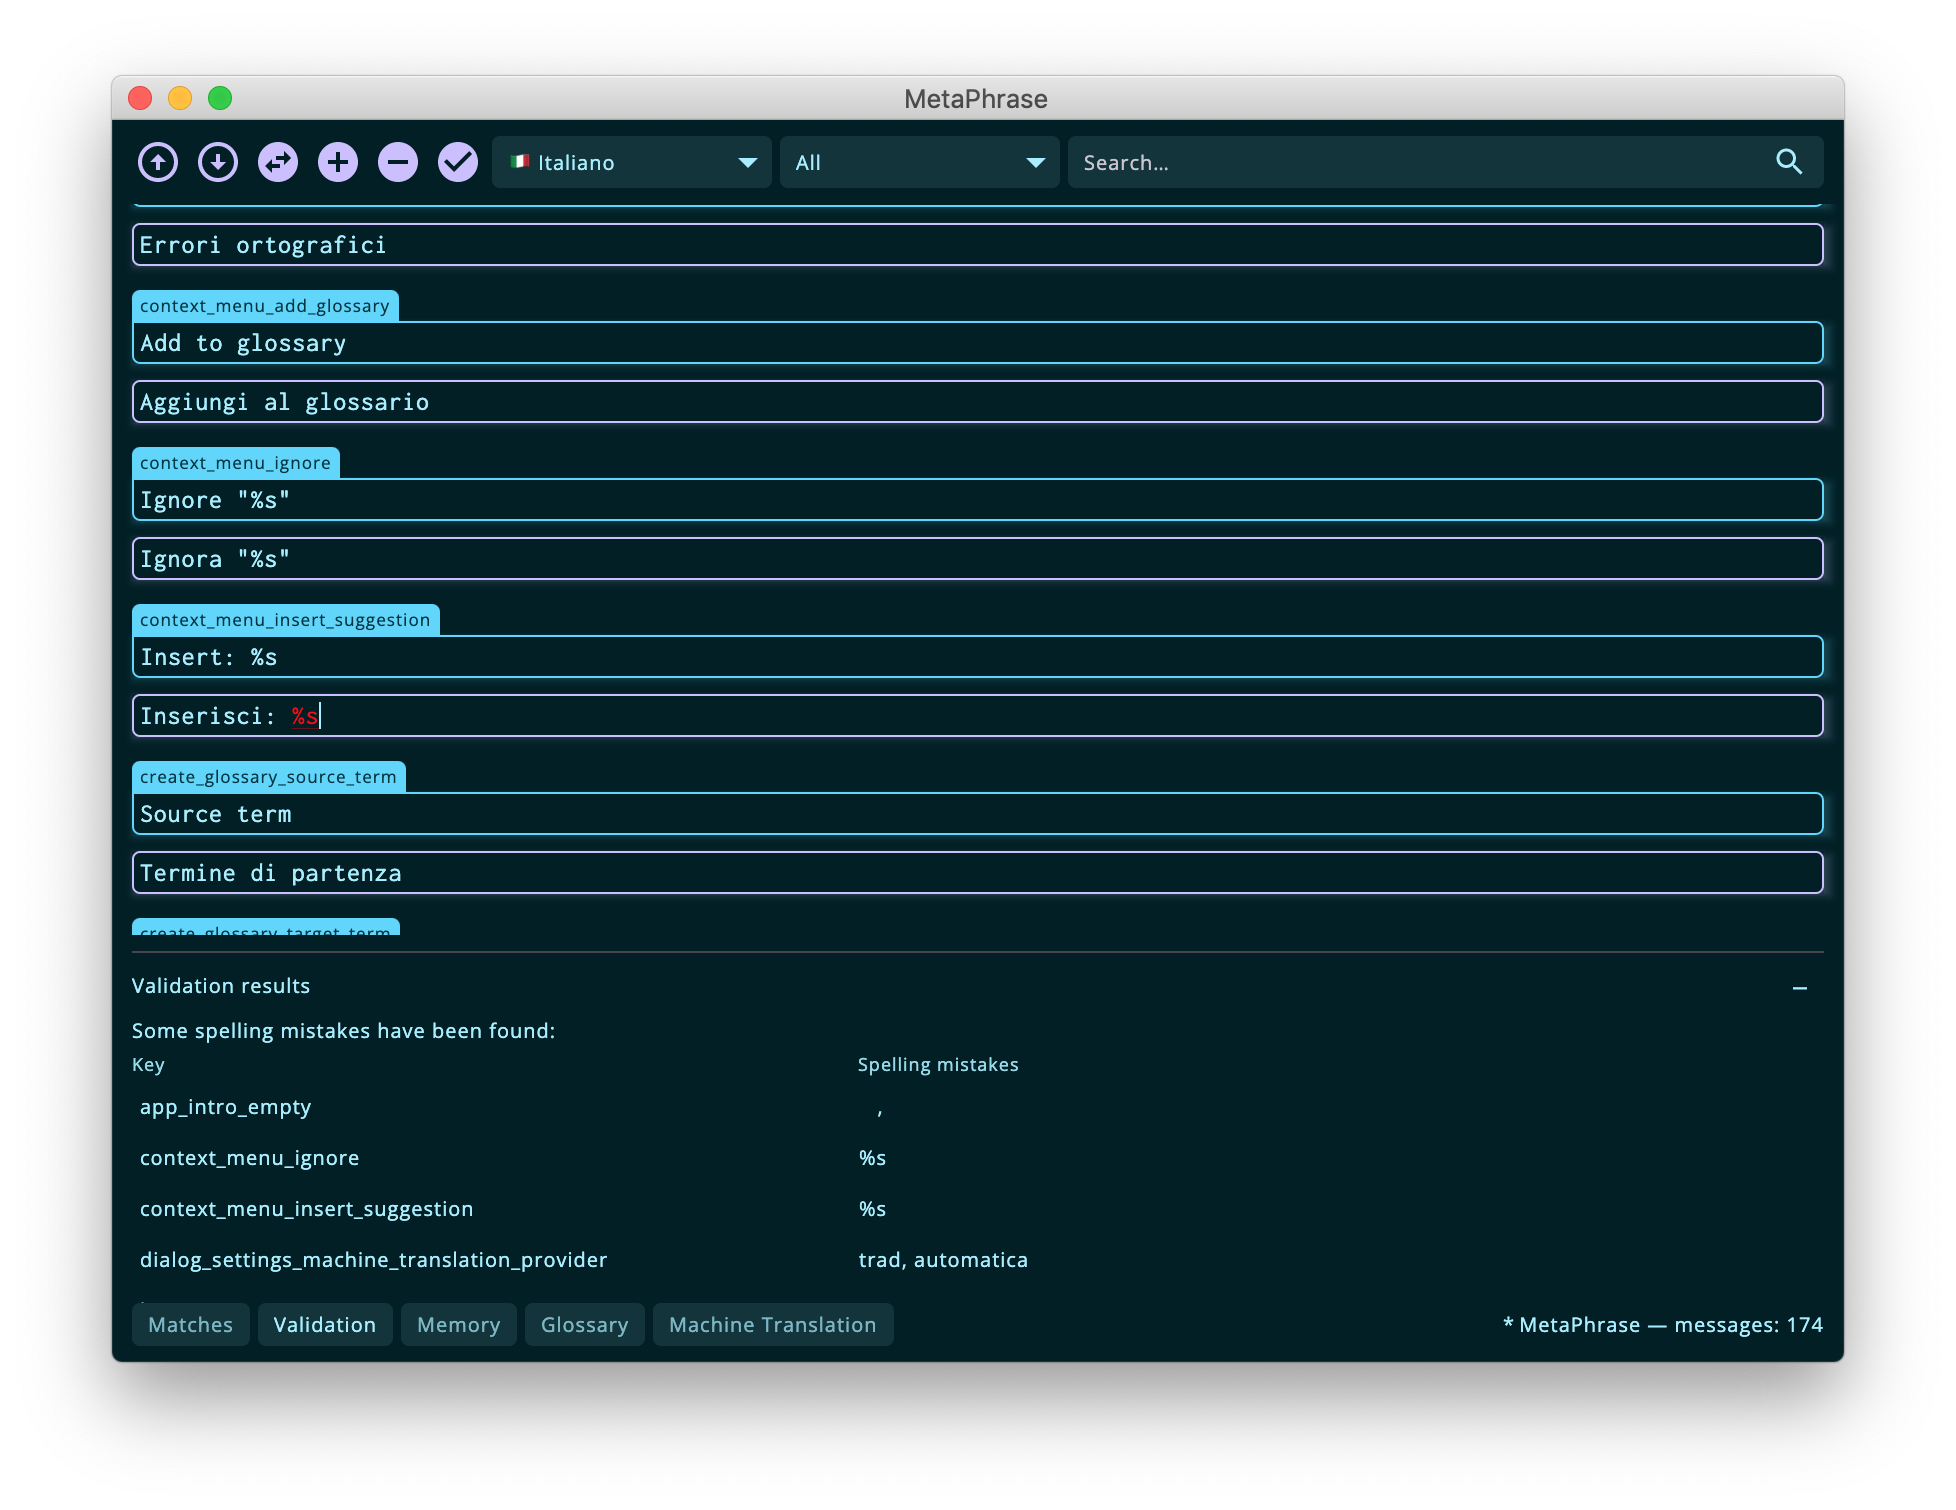
Placeholder validation can be activated either via the translation toolbar or with the “Message” > “Validate placeholders” menu item. When this function is activated, the panel is populated with a list of all the messages that contain validation errors, i.e. mismatches between the format specifiers appearing in the source and target messages.

By clicking on each row, the editor will scroll to the corresponding message to fix the problem. Invalid placeholders will lead the application runtime failure for the users, so localizers must be extremely careful of them.
Spellcheck
MetaPhrase contains a spelling checker function (that can be enabled or disabled in the settings dialog). If the current language is supported, whenever a message is opened for translation it is checked for spelling and, should errors be found, the corresponding words will be highlighted in red and underlined. By right-clicking on a spelling error, it will be possible to insert one of the suggestions from the context menu.
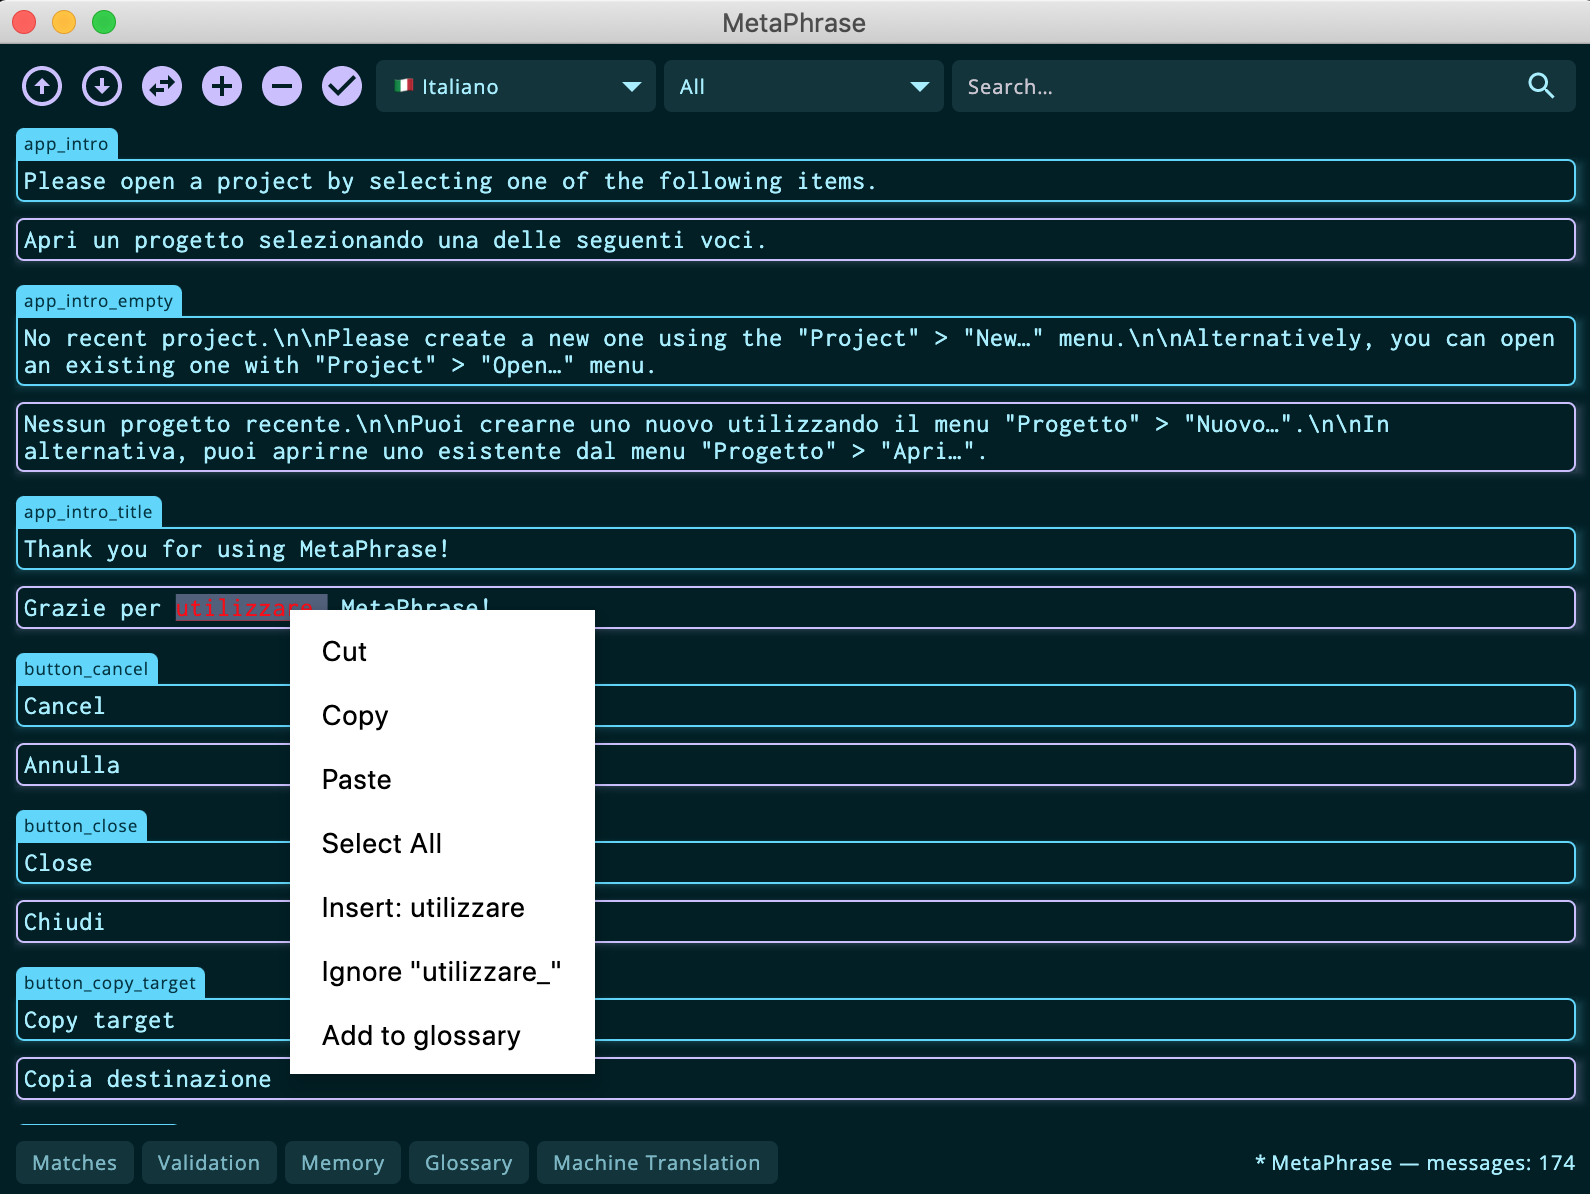
If you want to add a specific term to your custom dictionary (not to receive any more warning about that word being misspelled) you can add save it into your user defined words by right clicking on it and selecting the “Ignore” context menu item.
It is also possible to run a global spellcheck with the “Project” > “Check spelling” menu to inspect all the errors found in the validation panel. By clicking on each row the translation editor will scroll to the corresponding message to correct it.
Machine translation
Another way in which the application may facilitate the translation task if by means of providing suggestions from machine translation (MT) services. The two MT providers supported are:
- MyMemory which has great APIs and documentation and supports both obtaining results and submitting new segments and whole TMs
- DeepL which supports translation retrievals via API.
It is possible to retrieve a suggestion for the currently opened message with the “Retrieve” button (or “Refresh” if a translation is already present in the field). You can edit the suggestion and copy it to the editor with the “Insert” button.
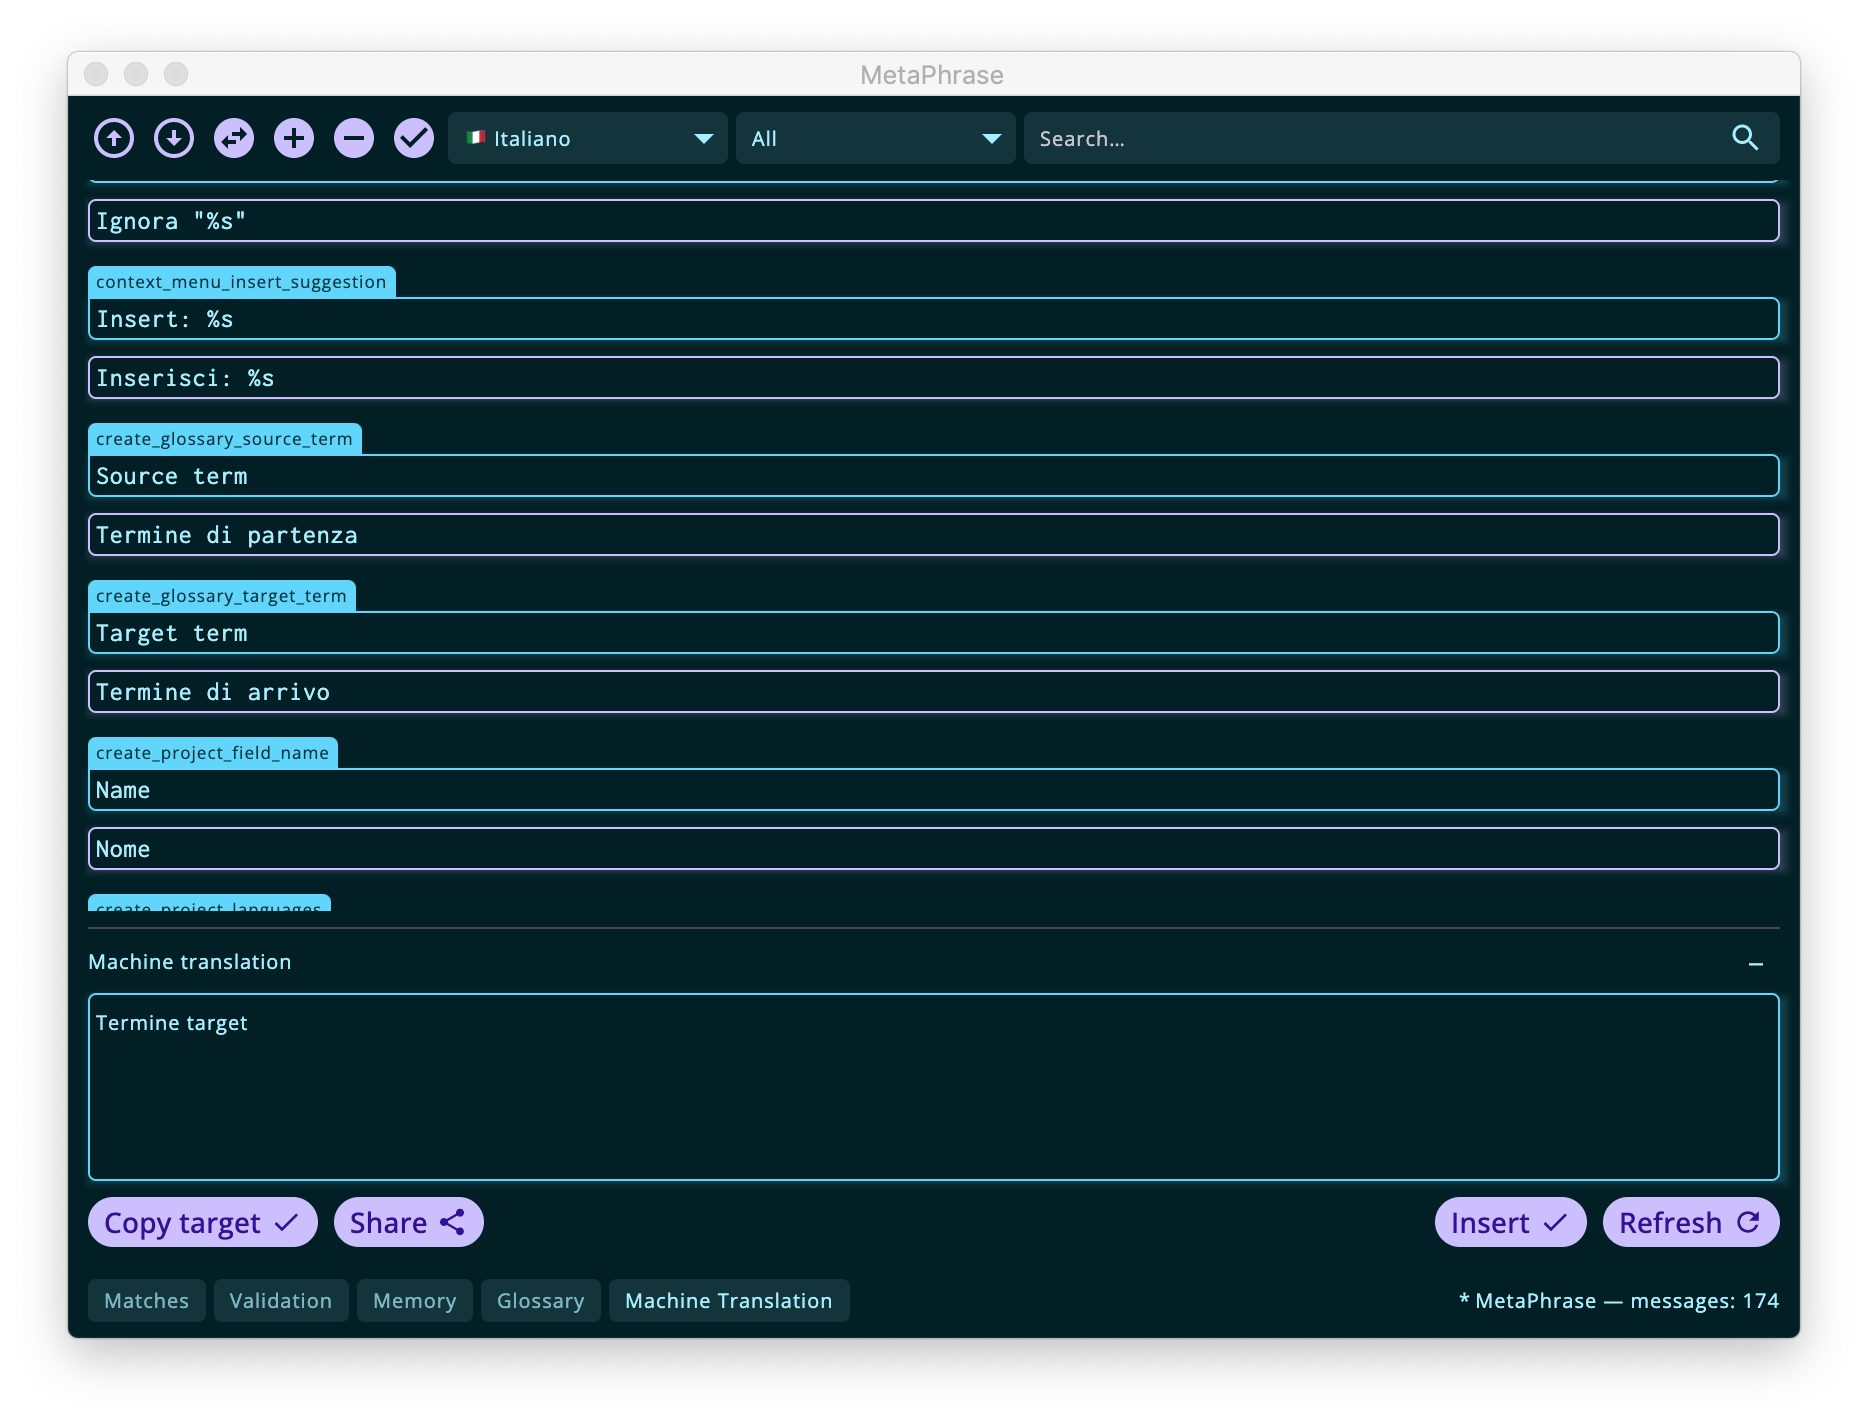
The bottons in the left side, on the other hand, allow to copy the existing translation to the suggestion field (“Copy target”) and, if you want, to share the translation with the machine translation service (“Share”). This is not available for all providers, depending on the operations that are supported by the provider APIs.
If you choose to do so, thank you for your generosity!
Back to project homepage.